There’s something magical about pulling your first homegrown garlic bulb from the soil. I still remember the excitement I felt when I harvested my first crop – those papery white bulbs were so much more flavorful and aromatic than anything I’d ever bought at the grocery store. After fifteen years of growing garlic at home, I can tell you that once you taste your own harvest, you’ll never want to go back to store-bought again.
Growing garlic at home might seem intimidating at first, but here’s the thing – garlic is actually one of the most rewarding crops you can grow. Yes, it takes patience (we’re talking about an 8-10 month journey from planting to harvest), but the hands-on work is minimal, and the payoff is incredible. Plus, there are so many gaps in the information out there about garlic cultivation that I want to fill for you.
In this comprehensive guide, I’ll walk you through everything you need to know about how to grow garlic successfully, from choosing the right varieties to harvesting and storing your crop. Whether you’re a complete beginner or you’ve tried growing garlic before with mixed results, this guide will give you the confidence and knowledge to grow the best garlic of your life.
Table of Contents
Understanding Garlic Varieties: Choose the Right Type for Your Garden
Look, I made the mistake early on of not paying attention to garlic varieties. I just grabbed whatever “seed garlic” I could find and wondered why my results were so inconsistent. Understanding the differences between garlic types is absolutely crucial for success with garlic cultivation.
Hardneck vs Softneck Garlic: What’s the Difference?
The first thing you need to understand is that there are two main types of garlic, and they have very different growing requirements and characteristics.
Hardneck garlic is what I grow here in Illinois, and it’s perfect for most northern gardeners. These varieties produce those curly flower stalks called garlic scapes (which are delicious, by the way!). Hardneck garlic needs a good cold period – at least 12-16 weeks below 45°F – to form proper bulbs. They’re hardy in zones 3-6 and have more complex, sometimes spicy flavors. The downside? They don’t store as long as softnecks, usually lasting about 4-6 months in proper storage.
Softneck garlic is the type you typically see in grocery stores. These varieties don’t produce flower stalks, which means all their energy goes into bulb development. They’re much better for warm climates (zones 7-10) and will store for 8-10 months when cured properly. Softneck garlic is also what you want if you’re planning to braid your harvest – those flexible stems make beautiful braids.
Here’s something most articles won’t tell you: you can sometimes grow hardneck varieties in warmer zones if you provide artificial vernalization (cold treatment) in your refrigerator, but the results are often disappointing. Trust me on this one – work with your climate, not against it.
Complete Garlic Variety Comparison Chart
I’ve put together this comprehensive variety comparison based on my years of growing different types and talking with fellow gardeners across the country. This is information you won’t find compiled anywhere else:
| Variety Name | Type | Best Climate Zones | Flavor Profile | Storage Duration | Harvest Timing |
|---|---|---|---|---|---|
| German Extra Hardy | Hardneck | 3-6 | Strong, spicy | 4-5 months | Mid-season |
| Music | Hardneck | 3-6 | Rich, full-bodied | 5-6 months | Late season |
| Purple Stripe | Hardneck | 3-7 | Complex, wine-like | 4-6 months | Mid-season |
| Chesnok Red | Hardneck | 3-6 | Sweet when cooked | 4-5 months | Early-mid season |
| California Early | Softneck | 7-10 | Mild, versatile | 8-10 months | Early season |
| Italian Late | Softneck | 7-10 | Strong, pungent | 8-12 months | Late season |
| Inchelium Red | Softneck | 6-9 | Mild, sweet | 6-8 months | Mid-season |
| Red Toch | Softneck | 8-10 | Hot, spicy | 10-12 months | Very late |
Elephant Garlic: The Gentle Giant
Now, let’s talk about elephant garlic because I get asked about this all the time. Here’s a fun fact: elephant garlic isn’t garlic at all! It’s more closely related to leeks, which explains why it has such a mild, almost onion-like flavor.
Elephant garlic produces those massive bulbs that look so impressive, and if you’re someone who finds regular garlic too strong, this might be perfect for you. The growing requirements are similar to regular garlic – it still needs that cold period and the same basic care. But don’t expect the same intense garlic flavor. I like to use elephant garlic, roasted whole or in dishes where I want a subtle garlic presence without the punch.
The cloves are huge (sometimes the size of regular garlic bulbs!), which makes them easier to plant and harvest. Just remember – if you’re looking for that classic garlic flavor for preserving or cooking, stick with true garlic varieties.
For more detailed variety guides and growing tips, explore our complete growing garlic resource center where you’ll find variety-specific growing guides and troubleshooting help.
When to Grow Garlic: Perfect Timing for Maximum Success
Getting the timing right is the most critical factor in successful garlic growing. I’ve seen so many gardeners fail simply because they planted at the wrong time. Let me break down exactly when to grow for the best results.
Fall Planting: The Traditional Method
Fall planting is the gold standard for growing garlic at home, and there’s good science behind why this works so well. Garlic needs vernalization – that extended cold period I mentioned earlier – to trigger bulb formation.
For northern climates (zones 3-6): Plant between mid-September and mid-October. I usually aim for 4-6 weeks before the ground freezes hard. Here in Naperville, that means I’m generally planting in early October.
If you’re not sure about your hardiness zone, check the official USDA Plant Hardiness Zone Map to determine the best planting timing for your area.
For southern climates (zones 7-10): You can wait until November or even December. The key is giving your garlic enough cold weather (below 45°F) for at least 12-16 weeks.
Here’s something I learned the hard way – don’t plant too early! I used to rush to get my garlic in the ground in September, and I’d end up with green shoots emerging before winter. Those shoots would often get damaged by harsh winter weather. Now I wait until the soil temperature consistently stays below 60°F.
When Should You Plant Garlic?
Your Garlic Planting Recommendation:
Can You Plant Garlic in Spring?
Every spring, I get emails asking about spring garlic planting, and I understand why – maybe you forgot to plant in the fall, or you just discovered you want to grow garlic. The truth is, you can plant garlic in spring, but your expectations need to be adjusted.
Spring-planted garlic typically produces smaller bulbs because it hasn’t had that natural cold treatment. Some varieties handle spring planting better than others – softneck varieties generally do better than hardneck varieties for spring planting.
If you want to try spring planting, here’s what I recommend: Buy your seed garlic in the fall and give it artificial vernalization. Store the bulbs in your refrigerator (not the freezer!) for 12-16 weeks, then plant as soon as you can work the soil in spring. Don’t separate the cloves until you’re ready to plant.
Moon Gardening: Planting Garlic by Lunar Cycles
Okay, I know some of you are going to think I’ve lost it here, but hear me out. My grandmother always planted garlic by the moon phases, and I’ve been experimenting with lunar planting for the past five years. While the scientific evidence is limited, there’s enough traditional knowledge and some interesting research to make it worth considering.
The traditional approach is to plant garlic during the waning moon (between full moon and new moon) for root crops. The theory is that during this phase, energy is focused downward into root development rather than leaf growth.
I’ve tracked my harvests, and I get slightly better bulb development when I plant during the waning moon, but proper timing for your climate zone is much more important than lunar phases. If you’re interested in trying moon gardening, use it as a fine-tuning tool, not your primary planting guide.
You can find lunar calendars online – I like the Old Farmer’s Almanac version – but don’t stress if your optimal planting window doesn’t align with the “perfect” moon phase.
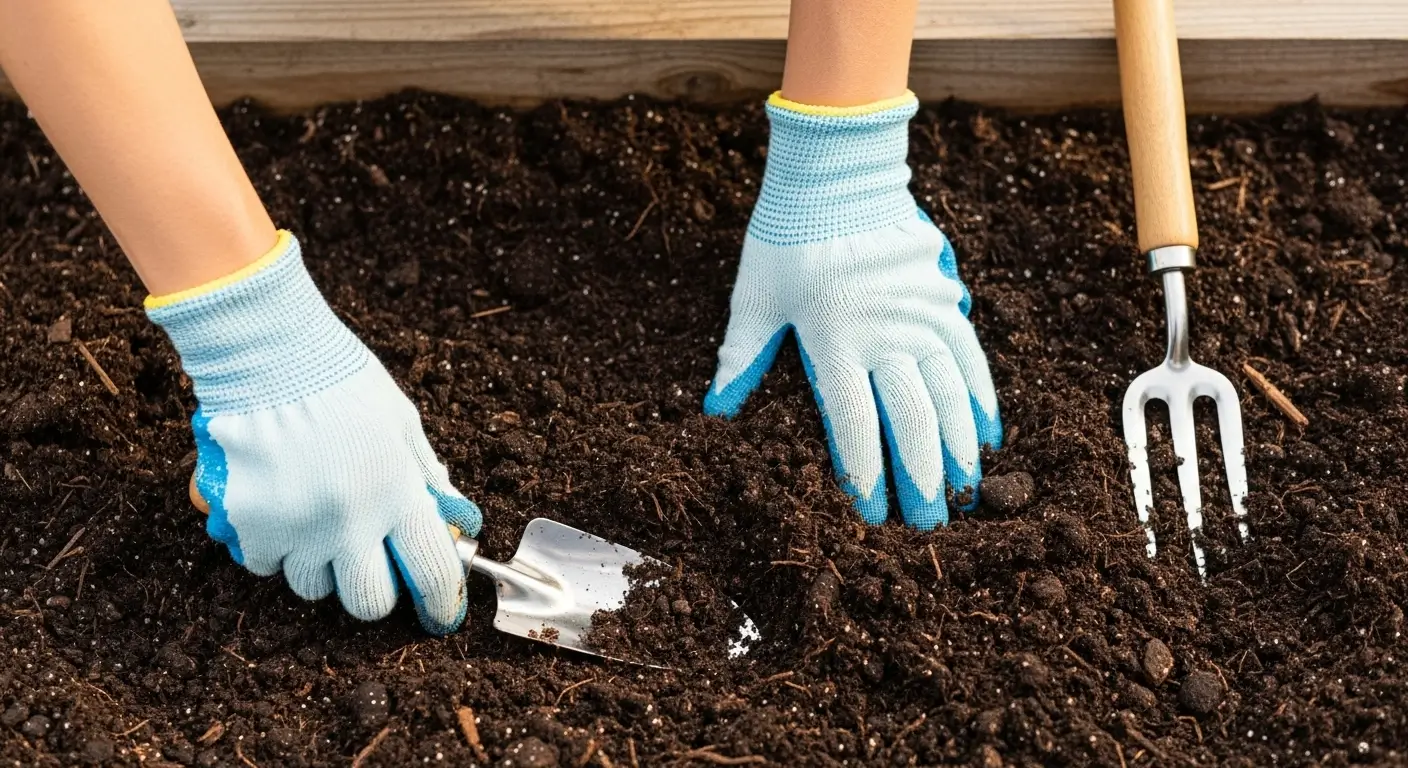
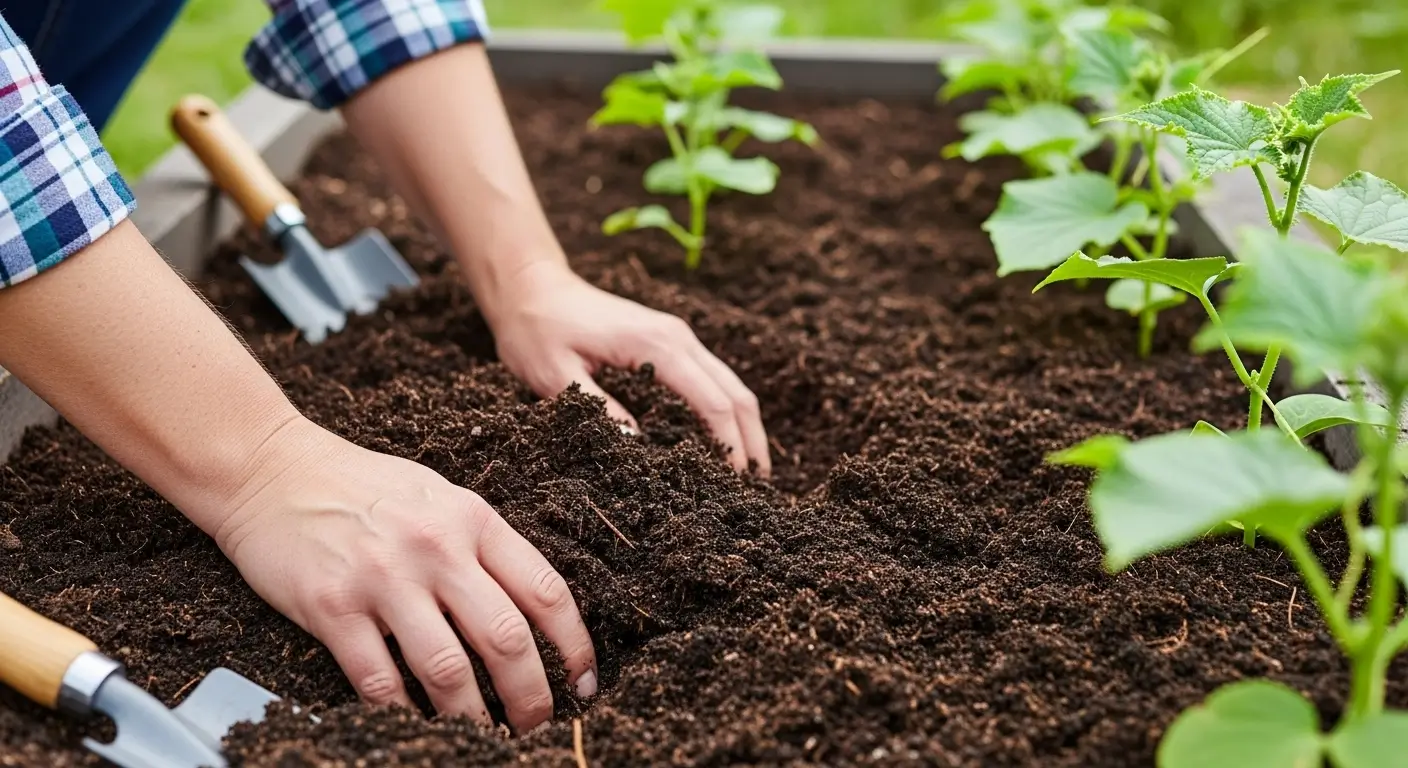
Soil Preparation and Planting Requirements
This is where a lot of gardeners go wrong with garlic cultivation. Garlic is forgiving, but it has some non-negotiable soil requirements. Get this part right, and you’re already halfway to a successful harvest.
Best Soil Conditions for Garlic
Garlic absolutely must have well-draining soil. I can’t stress this enough – garlic will rot in waterlogged conditions faster than almost any other crop I grow. The ideal soil is loose, loamy, and rich in organic matter.
Soil pH: Aim for 6.0-7.0. Garlic can tolerate slightly alkaline conditions better than acidic soil. I test my soil every fall before planting and adjust with lime if needed.
Drainage: This is critical. If you have heavy clay soil like I used to deal with in my first garden, you need to amend heavily or grow in raised beds. I’ve learned that even a few inches of elevation can make the difference between success and failure.
Organic matter: Garlic feeds heavily throughout its long growing season. Work in 2-3 inches of compost before planting, and your garlic will thank you with bigger, healthier bulbs.
If you’re dealing with heavy soil, here’s what works: Add coarse sand (not fine sand, which can create concrete-like conditions) and lots of compost. I also add perlite sometimes to improve drainage. The goal is soil that drains well but still holds nutrients.
Organic Soil Amendment Schedule
Here’s my proven organic feeding regimen that I’ve developed over years of trial and error. This schedule fills a gap I see in most garlic growing guides – they tell you to fertilize, but don’t give you the specific timing and rates.
4-6 weeks before planting (usually late August for me):
- Work 2-3 inches of compost into the planting area
- Add 1/2 cup of worm castings per planting hole
- Apply kelp meal at one tablespoon per square foot
- Add rock phosphate at one teaspoon per square foot for phosphorus
Early spring (when shoots are 4-6 inches tall):
- Side-dress with fish emulsion diluted to half strength
- Apply every 2-3 weeks until scapes form
- Stop nitrogen feeding once scapes appear (usually late May/early June)
Mid-spring bulb development:
- Switch to potassium-rich organic fertilizers
- I use wood ash sparingly or kelp meal
- This supports bulb sizing without encouraging too much leaf growth
Preparing Garlic Bulbs for Planting
This is huge – you cannot just plant garlic from the grocery store. Seriously, don’t even try. Commercial garlic is often treated with sprout inhibitors, may carry diseases, and the varieties are usually not suited to home growing.
Where to buy seed garlic: I get mine from specialty suppliers like Filaree Garlic Farm, Southern Exposure, or local garden centers that carry untreated varieties. Order early – the best varieties sell out by late summer.
When to separate cloves: Don’t separate cloves until you’re ready to plant! I used to separate them weeks ahead of time, and the cloves would dry out or start sprouting prematurely. Separate them the day you grow or the day before at most.
Pre-planting treatment: I soak my cloves in a mild baking soda solution (1 teaspoon per cup of water) for 30 minutes before planting. This helps prevent fungal issues. Some gardeners use fish emulsion or compost tea – whatever you choose, keep the soaking time under an hour.
Identifying good cloves: Choose the largest, firmest cloves from your bulbs. Discard any that are soft, damaged, or have dark spots. Each clove should still have its papery wrapper intact.
How to Grow Garlic: Step-by-Step Planting Instructions
Alright, let’s get our hands dirty! I’m going to walk you through exactly how I plant garlic, including some tricks I’ve learned that make a real difference.
Planting Garlic in the Ground
Step 1: Prepare your bed. Mark out rows 12 inches apart. I use a rake handle to make shallow furrows – it gives me perfectly straight rows and consistent spacing.
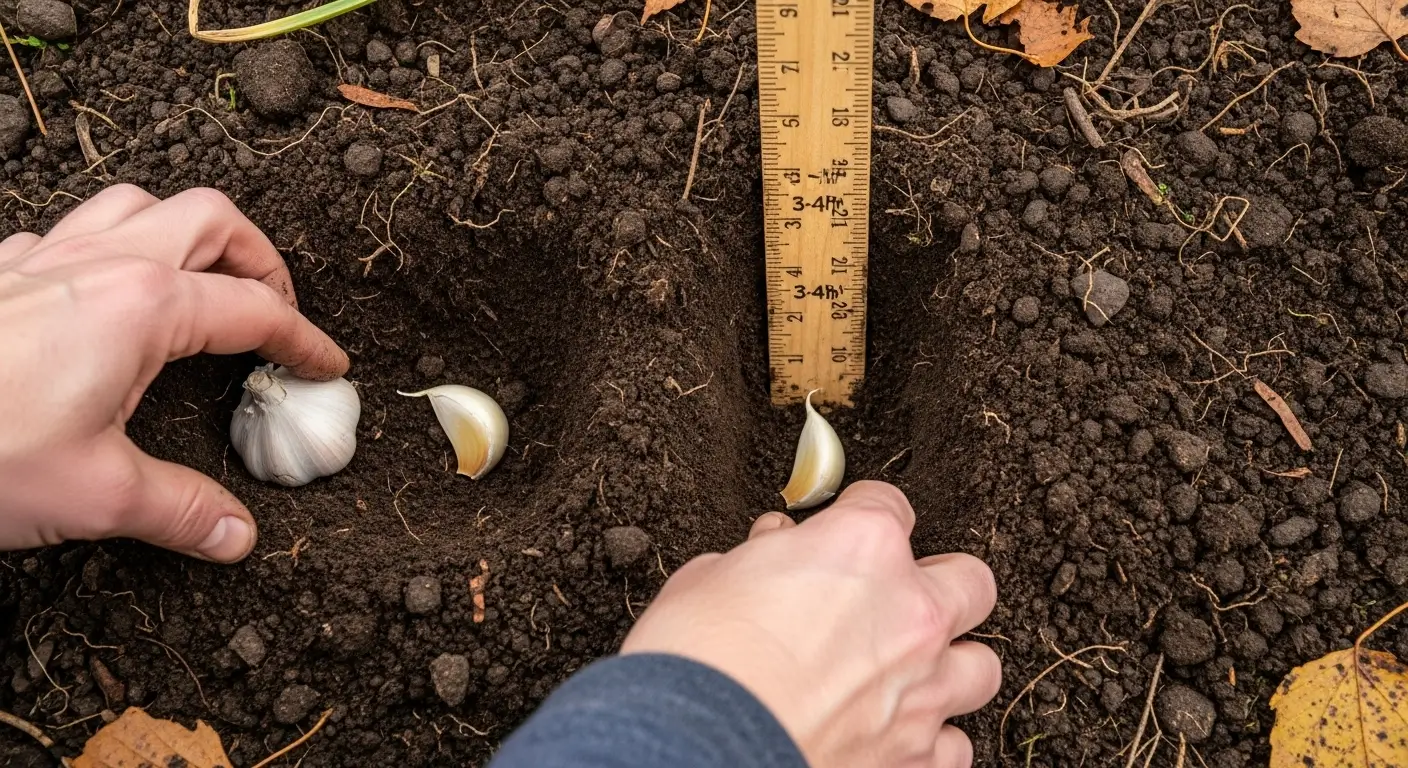
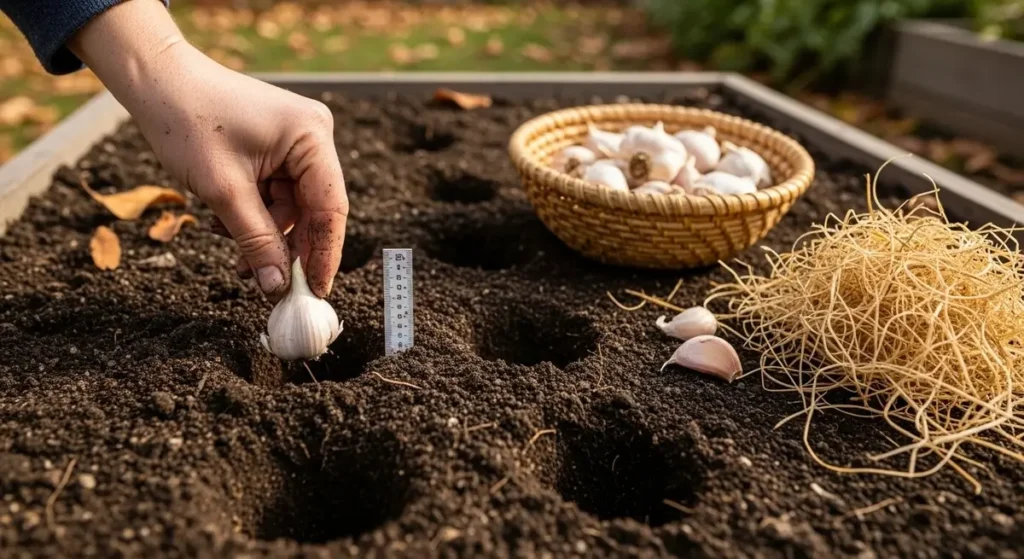
Step 2: Plant the cloves. Place cloves pointed end up, 2 inches deep, and 4-6 inches apart within rows. Here’s a trick: I use a bulb planter or even a large screwdriver to make consistent holes. The pointed end has the growing tip, so orientation matters!
Step 3: Backfill and water. Cover with soil and water gently. Don’t soak the area – just settle the soil around the cloves. Too much water at planting can cause rot.
Step 4: Mulch Apply 3-4 inches of straw mulch after planting. This insulates the cloves, suppresses weeds, and helps maintain soil moisture. I always use straw, not hay – hay has too many seeds.
The most common mistake I see? Planting too shallow. Garlic planted only 1 inch deep often heaves out of the ground during freeze-thaw cycles. Two inches deep is the sweet spot for most climates.
Growing Garlic in Containers
Container growing is perfect if you’re short on space or have soil issues. I’ve been growing garlic in containers for years, and with the right setup, you can get excellent results.
Container specifications:
- Minimum 8-10 inches deep (12 inches is better)
- At least 12 inches wide for multiple cloves
- Must have drainage holes – I drill extra holes in purchased pots
Potting mix recipe: I make my mix: 1/3 quality potting soil, 1/3 compost, 1/3 perlite or coarse sand for drainage. Add a handful of worm castings and kelp meal to each pot.
Planting in containers: Plant cloves 3-4 inches apart in containers (slightly closer than in the ground). The same depth rules apply – 2 inches deep, pointed end up.
Container care:
- Water when the top inch of soil is dry
- Move containers to protect from extreme cold (below 10°F)
- Feed every 3-4 weeks with diluted fish emulsion during the growing season
One thing about container growing – you’ll need to water more frequently than garden-grown garlic, especially in spring when growth takes off. But the convenience of being able to move containers for optimal sun exposure makes it worth the extra attention.
Planting Garlic in Modules and Transplanting
This is an advanced technique I started experimenting with a few years ago. I plant cloves in cell packs or small pots in the fall, overwinter them in a cold frame, then transplant them in early spring.
Benefits: Better root development, protection from rodents eating cloves, ability to select the strongest plants for transplanting.
Timeline: Plant in modules 2-3 weeks earlier than you’d direct plant. Transplant when shoots are 3-4 inches tall in spring.
Success rates: In my trials, transplanted garlic performs just as well as direct-planted, sometimes better, because I’m selecting the strongest plants.
Garlic Care Throughout the Growing Season
Here’s something most guides don’t tell you – garlic is pretty low-maintenance once it’s established, but there are specific care tasks at particular times that make a huge difference in your final harvest.
Monthly Garlic Care Calendar
October-December (Fall care):
- Mulch after planting but before a hard freeze
- Water once after planting. If the soil is dry, then stop watering
- Mark your rows – you’ll forget where you planted!
- Keep the area weed-free until snow cover.
January-March (Winter care):
- Check mulch after heavy snow or wind
- Do nothing else! Seriously, resist the urge to fuss with sleeping garlic
- Start getting excited – shoots will emerge soon
April-May (Spring awakening):
- Remove some mulch as shoots emerge
- Begin fertilizing when shoots are 4-6 inches tall
- Start watering if spring is dry
- Side-dress with compost
June-July (Bulb development):
- Remove scapes as they appear (hardneck varieties)
- Stop nitrogen fertilization
- Reduce watering as harvest approaches.
- Watch for harvest indicators.
Advanced Fertilizing Schedule & Deficiency Symptoms
This is where my experience shows. I’ve learned to read garlic plants like a book, and I can tell you exactly what different symptoms mean.
Early spring feeding (April): When shoots are 4-6 inches tall, I apply fish emulsion at half strength every 2-3 weeks. This gives them the nitrogen boost they need for leaf development.
Late spring transition (May): As scapes begin to form, I switch to kelp meal or other potassium-rich fertilizers. This supports bulb development without pushing excessive leaf growth.
Deficiency identification:
- Yellow leaves from the bottom up: Usually normal senescence, especially after scape removal. If yellowing starts early (April/May), it might be a nitrogen deficiency.
- Purple-tinged leaves: Phosphorus deficiency, common in cold, wet springs. Fish bone meal helps here.
- Brown leaf tips: Either potassium deficiency or water stress. Check soil moisture first.
When to stop feeding: I stop all fertilization once I remove scapes. Late-season feeding can delay harvest and reduce storage life.
Managing Garlic Scapes: When and How to Remove
If you’re growing hardneck garlic, you’ll get scapes, and knowing when and how to handle them is crucial for bulb development.
What are scapes: Those curly flower stalks that emerge in late May or June. They’re the plant’s attempt to reproduce sexually rather than through bulb division.
When to remove: Cut them when they make one full curl, but before they straighten out. Wait too long, and the plant puts too much energy into seed production instead of bulb sizing.
How to remove: Cut, don’t pull. I use clean garden shears and cut right at the base where the scape emerges from the leaves.
Don’t waste them! Scapes are delicious – they taste like mild garlic with a green, fresh note. I make scape pesto every year: blend scapes, olive oil, parmesan, and pine nuts. It’s amazing on pasta or as a sandwich spread.
To leave or not to leave: Some gardeners leave one or two scapes to produce bulbils (tiny garlic bulbs) for propagation. If you do this, expect smaller main bulbs from those plants.
Companion Planting and Crop Rotation for Garlic
Garlic plays well with lots of other crops, and understanding these relationships can help you maximize your garden space and naturally manage pests.
Best Companion Plants for Garlic
Brassicas (cabbage, broccoli, kale): This is my favorite garlic companion combination. Garlic deters cabbage moths and other brassica pests, while brassicas don’t compete much with garlic’s root system since they have different growth patterns.
Tomatoes: I always plant garlic near my tomatoes. There’s good evidence that garlic helps deter aphids and may even improve tomato flavor. Plus, the growing seasons complement each other perfectly.
Roses: Garlic around rose bushes is traditional for good reason. It helps control aphids naturally, and the strong scent can mask the roses from some pests.
Lettuce and greens: Perfect for interplanting. Since garlic is dormant in winter and lettuce grows best in cool weather, you can grow lettuce between your garlic rows in late fall and early spring.
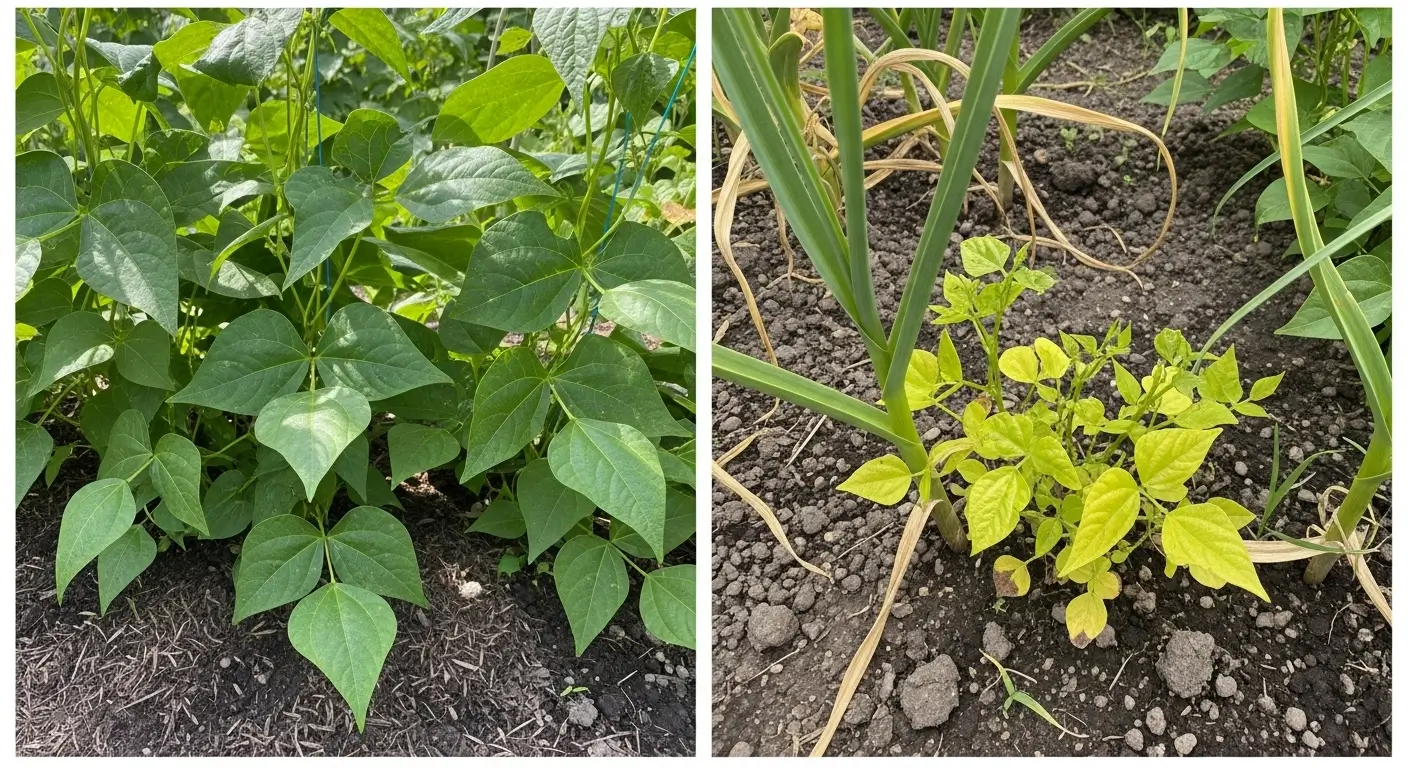
- Beans and peas: Garlic can inhibit their growth. Keep them at least 3 feet apart.
- Asparagus: Their root systems compete, and neither performs as well when planted together.
Garlic as Natural Pest Control
I’ve been amazed at how effective garlic is as a natural pest deterrent. Here’s what I’ve observed in my garden and what the research supports:
Aphids: Garlic definitely helps control aphids on nearby plants. The sulfur compounds in garlic are naturally repellent to these soft-bodied insects.
Cabbage moths: I’ve seen significantly fewer cabbage moth caterpillars on brassicas planted near garlic rows.
Carrot flies: Traditional companion planting wisdom says garlic helps deter carrot flies, and my experience supports this.
Homemade garlic spray: Blend 3-4 garlic cloves with 2 cups of water and a few drops of dish soap—strain and spray on affected plants. Reapply after rain. It’s not a miracle cure, but it does help as part of an integrated pest management approach.
Crop Rotation Guidelines for Allium Family
Here’s something crucial that most articles miss – proper crop rotation for garlic and other alliums (onions, leeks, chives) to prevent disease buildup.
4-year rotation schedule:
- Year 1: Plant garlic
- Year 2: Follow with heavy feeders like tomatoes or corn
- Year 3: Plant legumes to restore nitrogen
- Year 4: Root crops or brassicas before returning to garlic
Why this matters: Onion white rot is a soil-borne fungus that can persist in soil for decades. Once you have it, that area is essentially unusable for alliums. Proper rotation, along with good sanitation, is your best defense.
Soil improvement between rotations: I always add compost and organic matter during the off years. Cover crops like winter rye or clover also help build soil health between garlic plantings.
Common Problems and Solutions
Let me share the most common problems I see with home garlic growing and how to prevent or fix them. Most of these issues are completely avoidable with proper planning.
Why Your Garlic Isn’t Forming Bulbs
This is heartbreaking when it happens – you get beautiful green growth all season, then dig up tiny bulbs or sometimes just single, undivided cloves. Here are the usual culprits:
Insufficient cold period: This is the number one cause. If your seed garlic didn’t get 12-16 weeks below 45°F, it won’t trigger bulb formation. Solution: Choose varieties appropriate for your climate zone and plant at the right time.
Wrong variety for your climate: I see southern gardeners trying to grow hardneck varieties that need more cold than they get. Similarly, northern gardeners sometimes plant softnecks that don’t get triggered properly by their frigid winters.
Planted too late: Late planting doesn’t give enough time for root development before winter dormancy. The plant then puts energy into catching up rather than bulb formation.
Nutrient imbalances: Too much nitrogen late in the season can delay bulbing. Stop feeding nitrogen once scapes appear.
Pest and Disease Management
Onion thrips: These tiny insects can cause silvery streaking on leaves and reduce bulb size. I control them with beneficial insects (like lacewings) and row covers during peak infestation periods.
Birds and rodents: Squirrels and birds love to dig up freshly planted cloves. I cover new plantings with row cover for the first month, then mulch heavily. Hardware cloth over beds also works.
Root maggots: These are larvae of onion flies that tunnel into bulbs. Crop rotation and beneficial nematodes help control them organically.
Onion white rot: This soil-borne fungus causes yellowing leaves and white, fluffy growth at the base of plants. There’s no cure – infected plants must be removed and destroyed. This is why crop rotation is so important.
Environmental Stress Solutions
Frost protection: Late spring frosts can damage emerging shoots. I keep row cover handy for surprise cold snaps, though established garlic is quite cold-hardy.
Heat stress: In very hot climates, garlic may go dormant early. Provide afternoon shade and consistent moisture during heat waves.
Too much rain: Excessive rainfall during bulb development can cause rot. Improve drainage and consider growing in raised beds if this is a recurring problem.
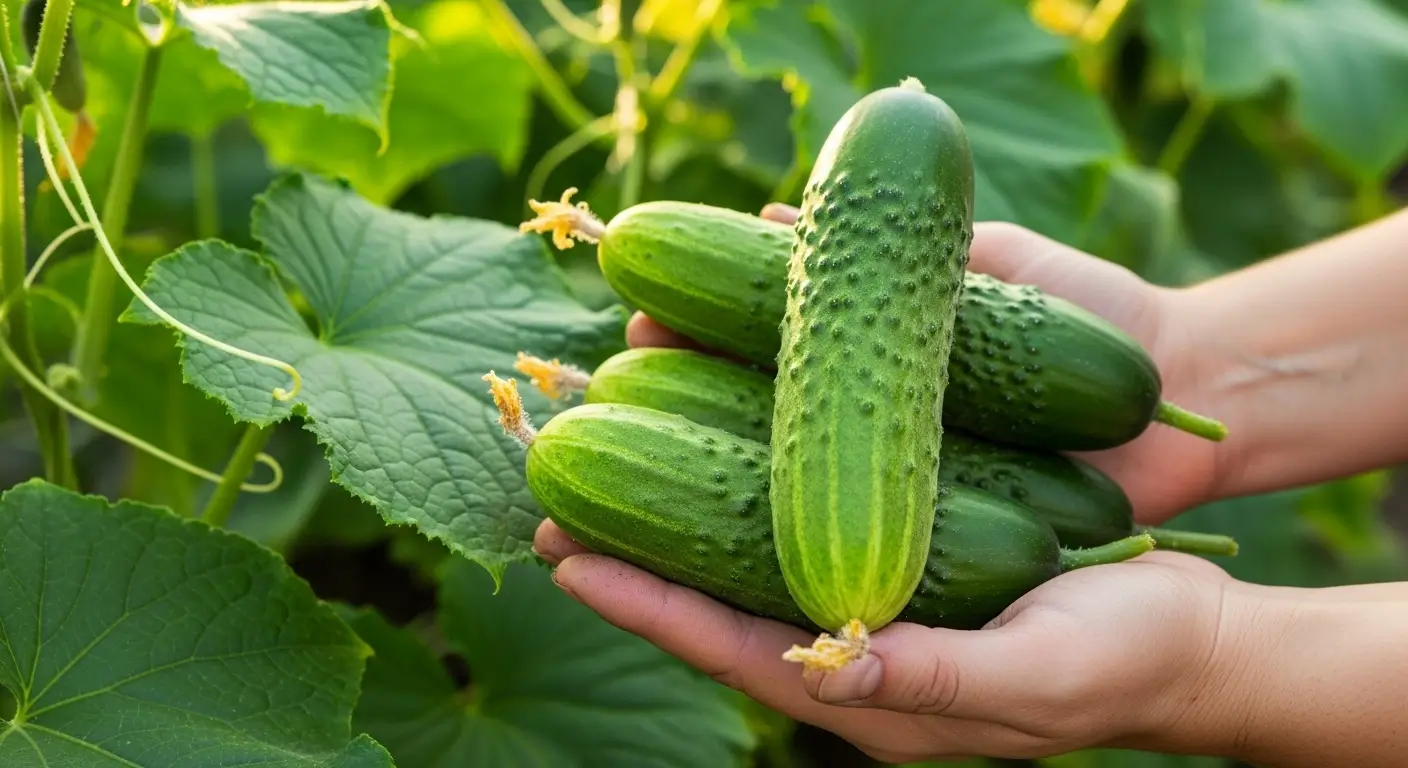
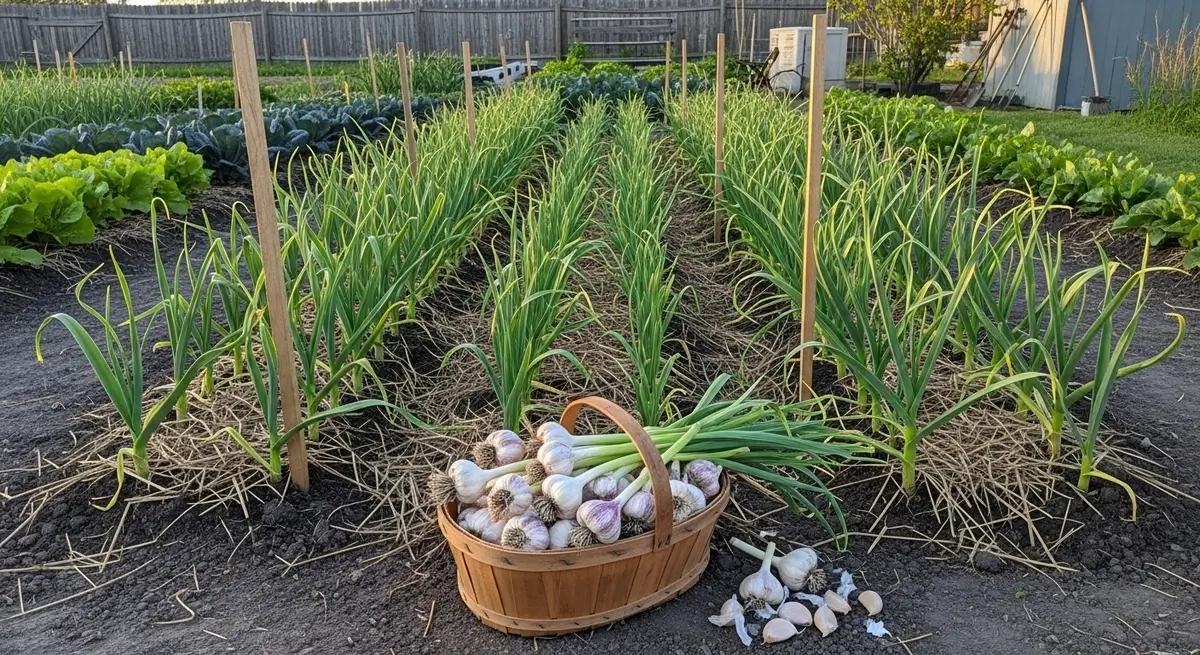
Harvesting Garlic: Perfect Timing and Techniques
Getting the harvest timing right makes the difference between garlic that stores for months and garlic that goes bad quickly. I’ve learned to read the subtle signs that tell me when my garlic is perfectly ready.
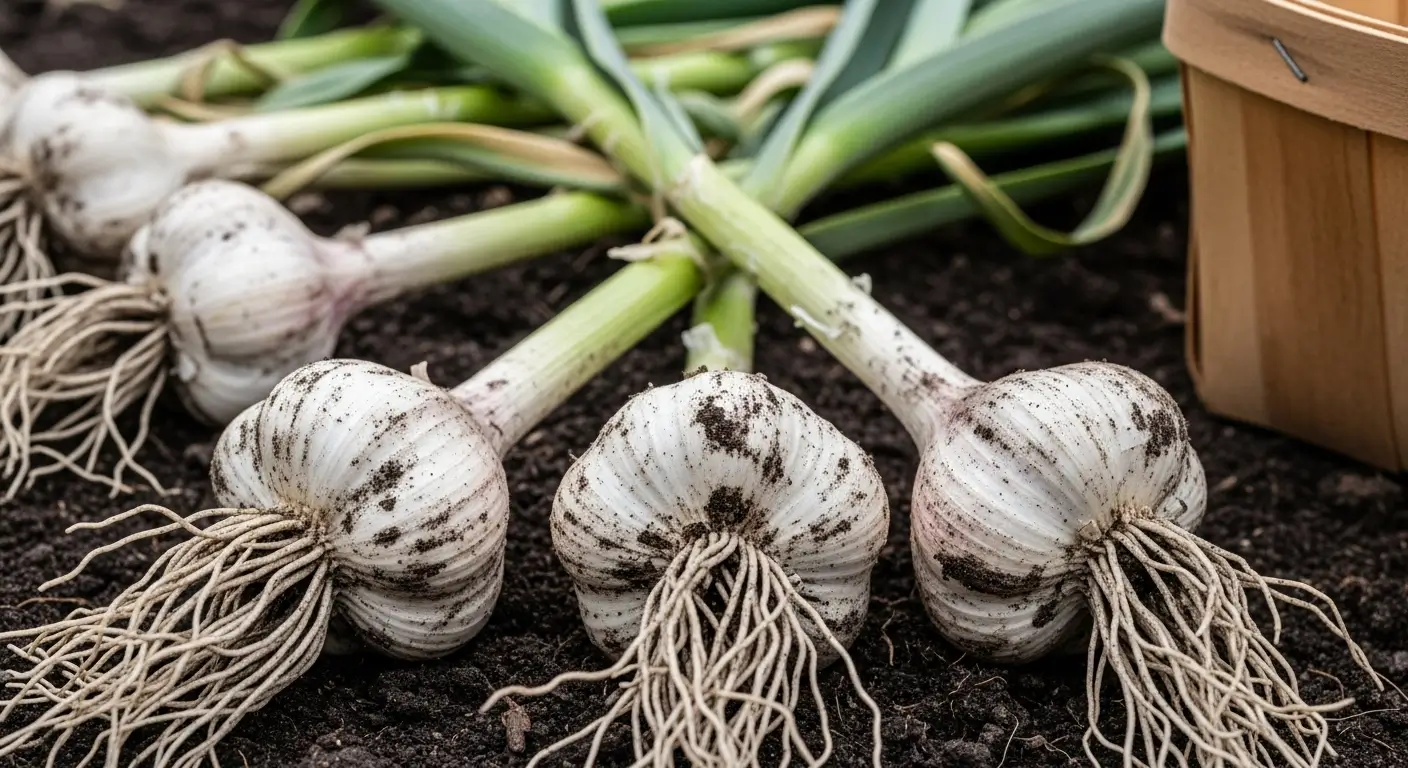
How to Know When Garlic is Ready to Harvest
The classic indicator: When the bottom third of leaves are brown but the top two-thirds are still green. This usually happens in mid to late July for me, but it varies by variety and growing conditions.
Test harvest method: About three weeks before you think harvest time has arrived, carefully dig up one bulb. The cloves should fill their wrappers completely, and there should be several layers of papery outer skin. If the cloves are small or the wrapper is still tight, wait another week and test again.
Please don’t wait too long: Over-mature garlic has cloves that split their wrappers and begin to separate. These bulbs won’t store well and are prone to rot.
Regional timing: Northern gardeners typically harvest late July to early August. Southern gardeners may harvest as early as May or June, depending on when they planted.
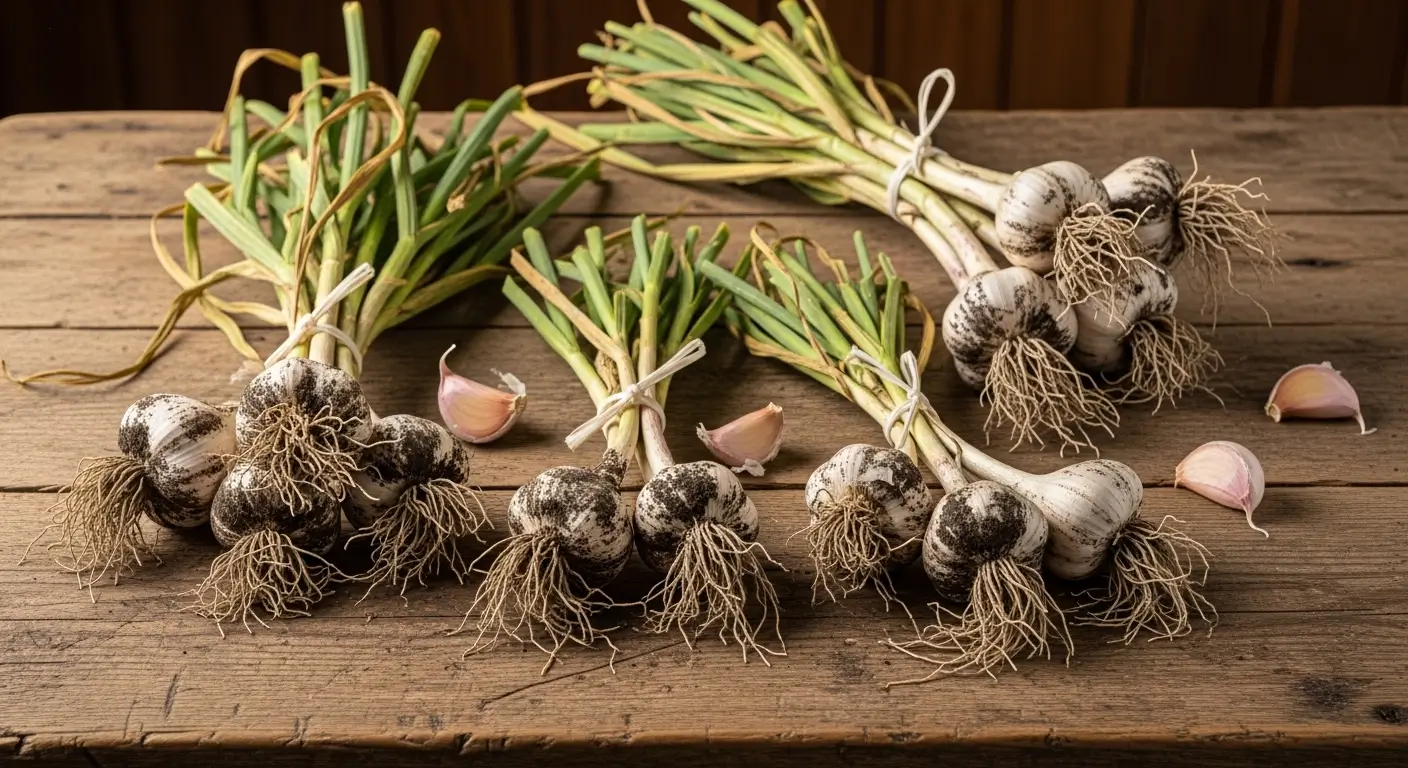
Proper Harvesting Technique
Choose the right day: Harvest during dry weather if possible. I avoid harvesting right after rain when the soil is muddy and bulbs are more prone to disease.
Lifting vs pulling: For hardneck varieties, I cut the scapes short and then carefully loosen the soil around bulbs with a fork before lifting. Softneck varieties with their flexible tops can often be pulled gently.
Initial cleaning: Brush off excess soil, but don’t wash the bulbs or remove roots yet. Leave the tops attached – you’ll clean them up after curing.
Handle gently: Damaged bulbs don’t store well, so treat your harvest like precious eggs. I use shallow baskets for transport to avoid bruising.
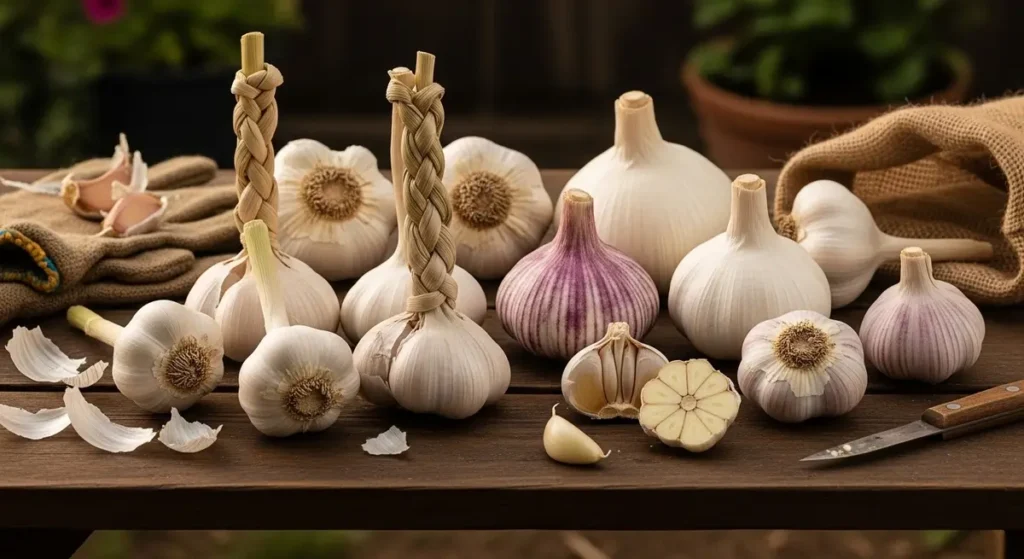
Curing and Storing Your Garlic Harvest
Proper curing is absolutely critical for long-term storage. Rush this process, and your beautiful harvest will be soft and unusable within weeks. Take the time to do it right, and you’ll have perfect garlic for months.
The Curing Process: Step-by-Step
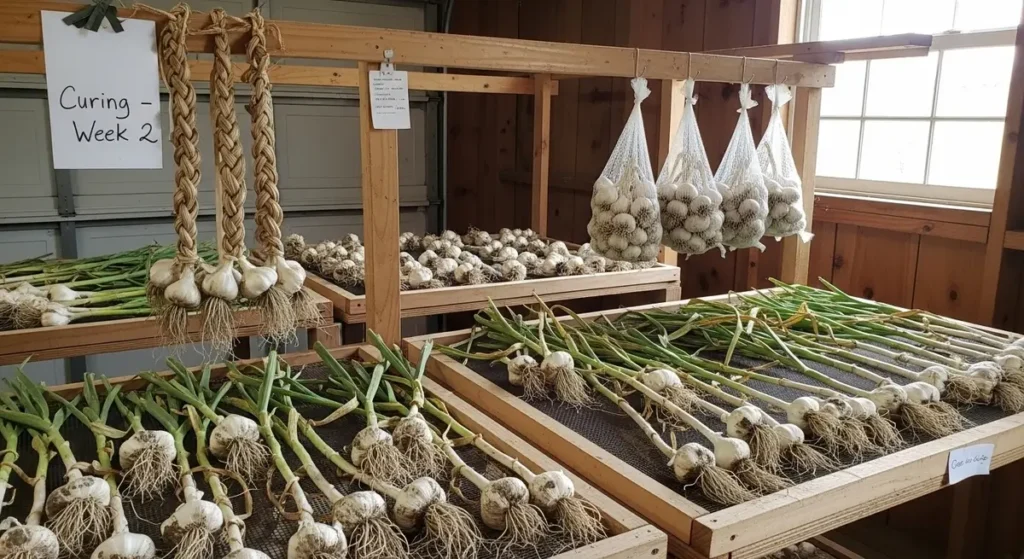
Ideal conditions: I cure my garlic in my garage, where temperatures stay around 70-80°F with good air circulation. You want warm, dry conditions with plenty of airflow.
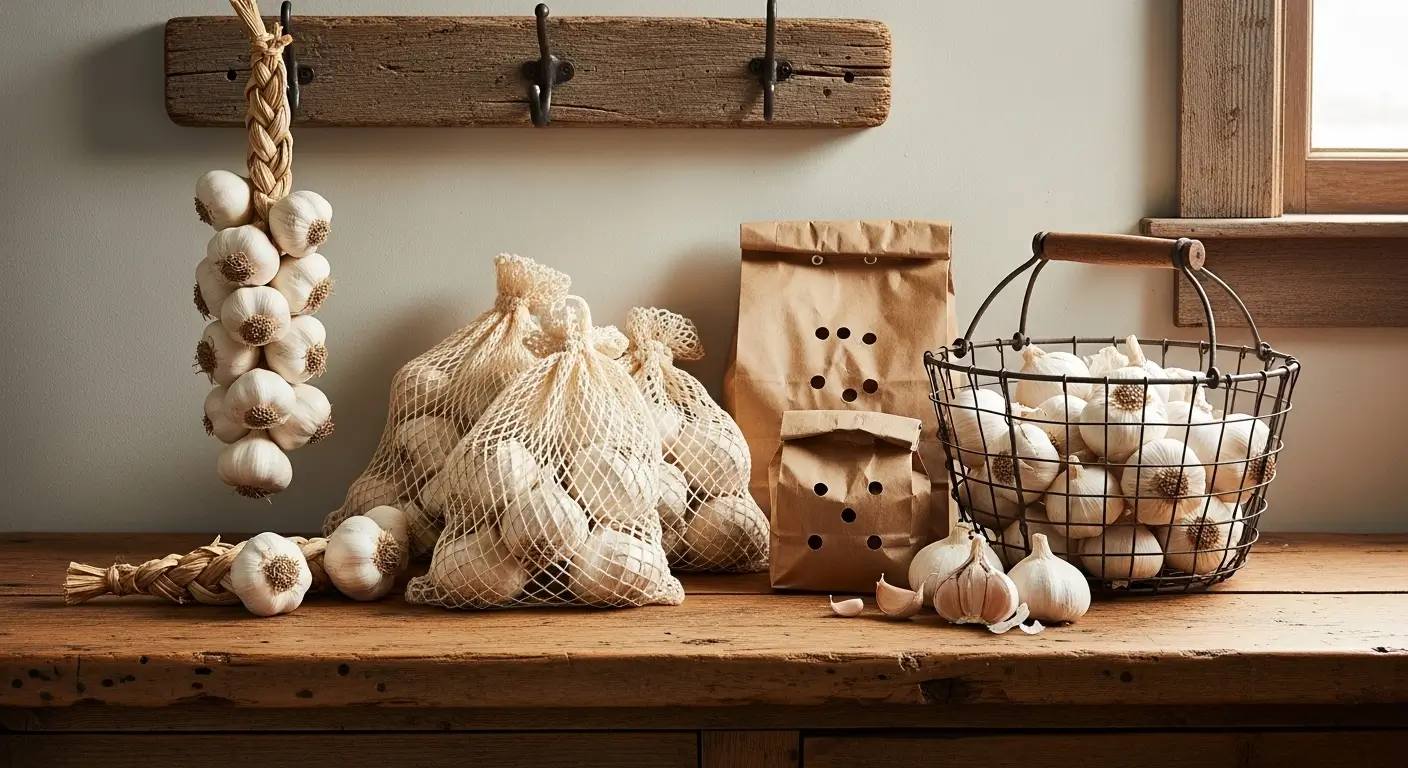
Curing setup: I lay bulbs on screens or hang them in mesh bags. The key is that air can circulate through each bulb. Avoid plastic containers or any place where moisture can accumulate.
Duration: Hardneck varieties need 2-3 weeks to cure properly. Softneck varieties may need 3-4 weeks. You’ll know they’re ready when the outer wrappers are papery and the roots are dry.
Signs of proper curing: The neck area (where the stem meets the bulb) should be completely dry and tight. If it’s still soft or green, continue curing.
Long-Term Storage Methods
Optimal conditions: After curing, I store my garlic at 55-65°F with 50-60% humidity and good air circulation. My basement storage room works perfectly.
Container options: I use mesh bags, shallow baskets, or wooden crates – anything that allows air circulation. Never store cured garlic in plastic bags.
Braiding softneck garlic: If you grew softneck varieties, braiding is both practical and beautiful. Braid while the stems are still pliable, but fully cured. Hang the braids in a cool, dry place.
Expected storage life: Properly cured and stored hardneck varieties last 4-6 months. Softneck varieties can last 8-12 months, sometimes longer.
Using and Preserving Garlic
Fresh garlic timeline: Use damaged bulbs first, then work through your harvest from smallest to largest bulbs. Check stored garlic monthly and remove any that show signs of sprouting or soft spots.
Green garlic: In early summer, before bulbs mature, you can harvest some plants for “green garlic” – it has a milder flavor, and the entire plant is edible.
Preservation methods: I freeze whole peeled cloves for cooking (they won’t work for fresh uses, but are perfect for soups and sauces). Dehydrating garlic for powder is another great option – slice thinly and dehydrate until crispy, then grind.
Safety note: Never store garlic in oil at room temperature – this can create conditions for botulism. If you want garlic oil, make small batches and keep them refrigerated for no more than a week.
Seed Saving and Garlic Propagation
One of the most rewarding aspects of growing garlic at home is developing your seed stock that’s perfectly adapted to your garden conditions.
Saving Garlic for Next Year’s Planting
Selection criteria: I always save my largest, best-formed bulbs for replanting. Choose bulbs with tight, undamaged wrappers and no signs of disease.
Storage for seed: Keep your planting garlic in slightly cooler, more humid conditions than eating garlic. I store mine at 50-55°F with 65-70% humidity.
Quantity planning: Save about 1.5 pounds of bulbs for every 100 square feet you want to plant next year. It’s better to have a few extras than to run short.
Avoiding inbreeding depression: If you’re saving seed from a small planting, occasionally introduce new genetics from outside sources to maintain genetic diversity.
Developing Your Garlic Varieties
Natural selection in action: Over time, your saved garlic will naturally adapt to your specific growing conditions. I’ve been selecting from the same original varieties for eight years now, and they perform better in my garden than freshly purchased seed garlic.
Selection traits: I select for larger bulb size, better storage life, disease resistance, and cold hardiness. Keep records of which bulbs perform best.
Timeline for improvements: You’ll start seeing noticeable improvements in the third generation (three years of selection). By the fifth generation, you’ll have garlic that’s truly adapted to your microclimate.
Record keeping: I keep simple records of planting dates, harvest yields, storage performance, and any disease or pest issues. This helps guide my selection decisions.
Frequently Asked Questions About Growing Garlic
Let me address the most common questions I get from fellow gardeners about garlic cultivation.
Can you plant supermarket garlic?
Please don’t try this! I know it’s tempting because supermarket garlic is convenient and cheap, but it’s almost always treated with sprout inhibitors to prevent sprouting on store shelves. Even if it does sprout, commercial varieties are usually not suited to home garden conditions, and you risk introducing diseases to your garden. Spend the extra money on proper seed garlic from reputable suppliers – your results will be dramatically better.
How long does it take garlic to grow?
Garlic is a long-season crop that takes 8-10 months from planting to harvest. Here’s the typical timeline: Fall planting (October), winter dormancy (November-March), active growth (April-June), bulb development (June-July), harvest (July-August). It requires patience, but the wait is absolutely worth it.
Do you need to soak garlic before planting?
Soaking isn’t strictly necessary, but I recommend it for disease prevention. A 30-minute soak in a mild baking soda solution (1 tsp per cup of water) helps prevent fungal issues. Some growers use fish emulsion or compost tea. Just don’t soak longer than an hour, as this can actually encourage rot.
How deep should garlic be planted?
Plant cloves 2 inches deep in most climates. In very cold areas (zones 3-4), you can plant up to 3 inches deep for extra winter protection. Too shallow (1 inch or less) and cloves may heave out during freeze-thaw cycles. Too deep and emergence may be delayed or weakened.
Does garlic need fertilizer?
Yes, but timing matters more than quantity. Garlic benefits from organic matter worked into the soil before planting, then light feeding in early spring when shoots emerge. I use fish emulsion every 2-3 weeks until scapes form, then switch to potassium-rich fertilizers for bulb development. Stop all nitrogen feeding once scapes appear to avoid delaying harvest.
Is mulching necessary for garlic?
I strongly recommend mulching, especially in cold climates. A 3-4 inch layer of straw mulch insulates cloves over winter, suppresses weeds, and helps maintain consistent soil moisture. Apply mulch after planting but before a hard freeze. Pull back some mulch in spring as shoots emerge to allow the soil to warm.
What happens if you plant garlic too early or too late?
Too early (August or early September) can result in premature sprouting before winter, making plants vulnerable to cold damage. Too late planting doesn’t allow enough root development before dormancy, leading to poor bulb formation. If you plant late, add extra mulch and don’t expect the largest harvest, but you’ll still get usable garlic.
How do you cure and store garlic after harvest?
Curing is essential for proper storage. After harvest, brush off soil, but don’t wash bulbs. Cure in a warm (70-80°F), dry, well-ventilated area for 2-4 weeks until outer wrappers are papery and necks are completely dry. Then store in a cool (55-65°F), dry place with good air circulation. Use mesh bags or shallow baskets – never plastic. Properly cured hardneck garlic stores 4-6 months, softneck varieties 8-12 months.
Can you eat garlic scapes?
Absolutely! Garlic scapes are not only edible but delicious. They have a mild garlic flavor with a fresh, green note. Harvest them when they make one full curl, but before they straighten out. I use them in stir-fries, make scape pesto, or grill them like asparagus. They’ll keep in the refrigerator for about a week, or you can freeze them for later use.
Why is my stored garlic sprouting or going bad?
This usually indicates improper curing or storage conditions. If garlic isn’t fully cured, it retains too much moisture and spoils quickly. Storage that’s too warm (above 70°F) or humid can trigger sprouting or rot. Check your storage area temperature and humidity, and make sure there’s adequate air circulation. Remove any sprouting or soft bulbs immediately to prevent the problem from spreading.
Conclusion: Your Journey to Garlic Growing Success
You know what? I get a little emotional thinking about all the gardeners who are going to plant their first garlic this fall because of this guide. There’s something magical about that moment when you realize you can grow this incredible crop that seems so mysterious at first.
I still remember my grandmother watching me plant my first garlic cloves – she had this knowing smile, like she knew I was about to fall in love with the whole process. And honestly? She was right. Fifteen years later, I still get that little thrill every October when I’m tucking those cloves into the soil, knowing I’m starting an eight-month journey that ends with something truly special.
Look, I’m not going to lie to you – your first harvest might not be perfect. Mine wasn’t! I had tiny bulbs, some that didn’t form properly, and I cured them wrong, so half of them went bad by November. But you know what? I learned from every mistake, and the garlic I grew was still infinitely better than anything I could buy.
The thing about garlic is that it teaches you patience in the best possible way. You can’t rush it, you can’t force it, you have to trust the process. Plant in fall, wait through winter (the hardest part!), tend gently in spring, and harvest in summer. It’s like a meditation on the seasons.
Start wherever you are – maybe you’ve got a huge garden plot, perhaps just a few containers on a balcony. Doesn’t matter. Choose a couple of varieties that make sense for your area, follow the basics we’ve covered, and give it a shot. Keep a little journal if you want – I still do, and it’s fun to look back at notes from years past.
And here’s the thing that gets me excited – once you start saving your seed garlic, you’re creating something unique to your garden. That Music garlic you plant this year? In five years, it’ll be your Music garlic, adapted to your soil, your climate, your care. There’s something profound about that connection.
So whether you’re doing this for the incredible flavor (seriously, wait until you taste your first homegrown bulb roasted with some olive oil), the satisfaction of growing your food, or just because you love the idea of nurturing something from a tiny clove into a beautiful bulb – welcome to the wonderful world of garlic growing.
I can’t wait to hear about your successes, your failures, your questions, and your discoveries. Drop me a line anytime – there’s nothing I love more than talking garlic with fellow enthusiasts. Trust me, once you’re part of the garlic-growing club, you’re family.
Now get yourself some seed garlic and let’s do this thing!