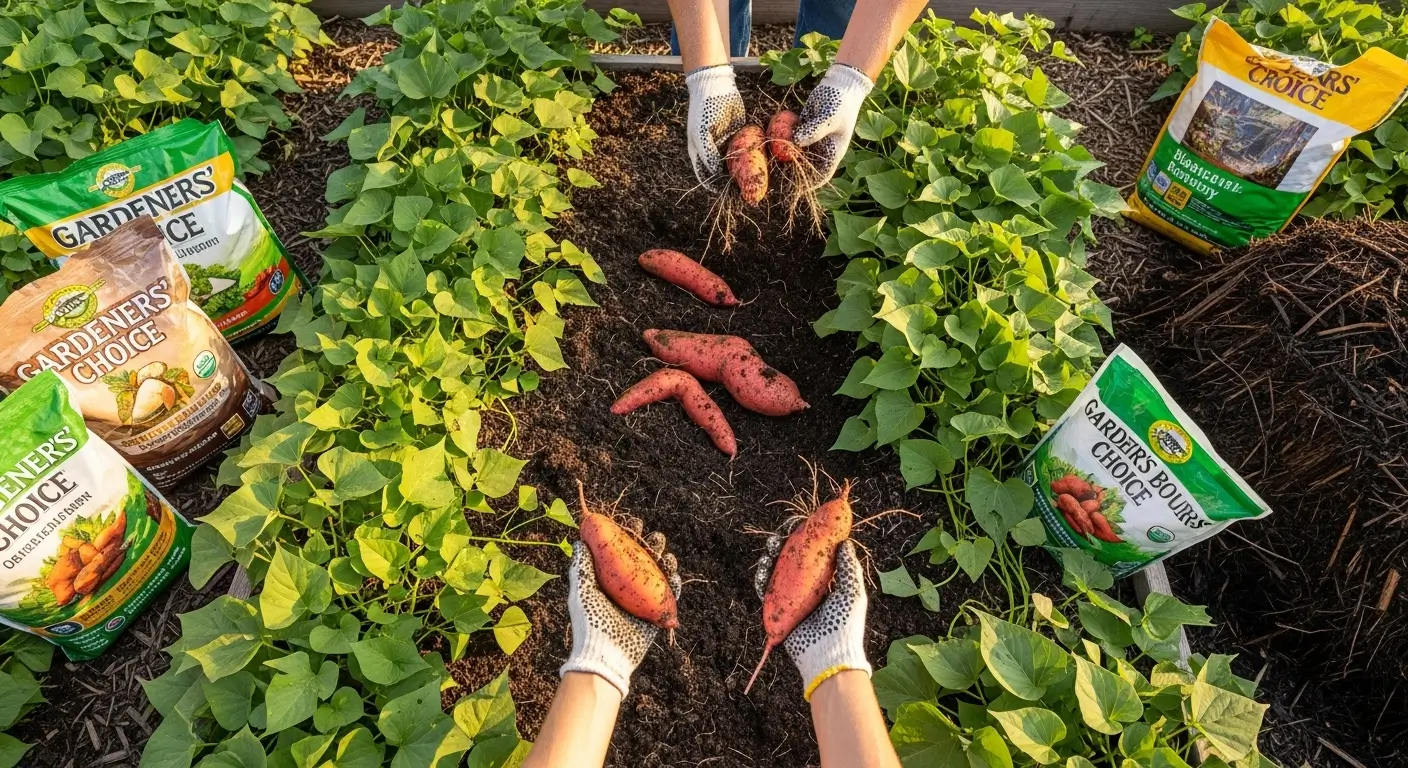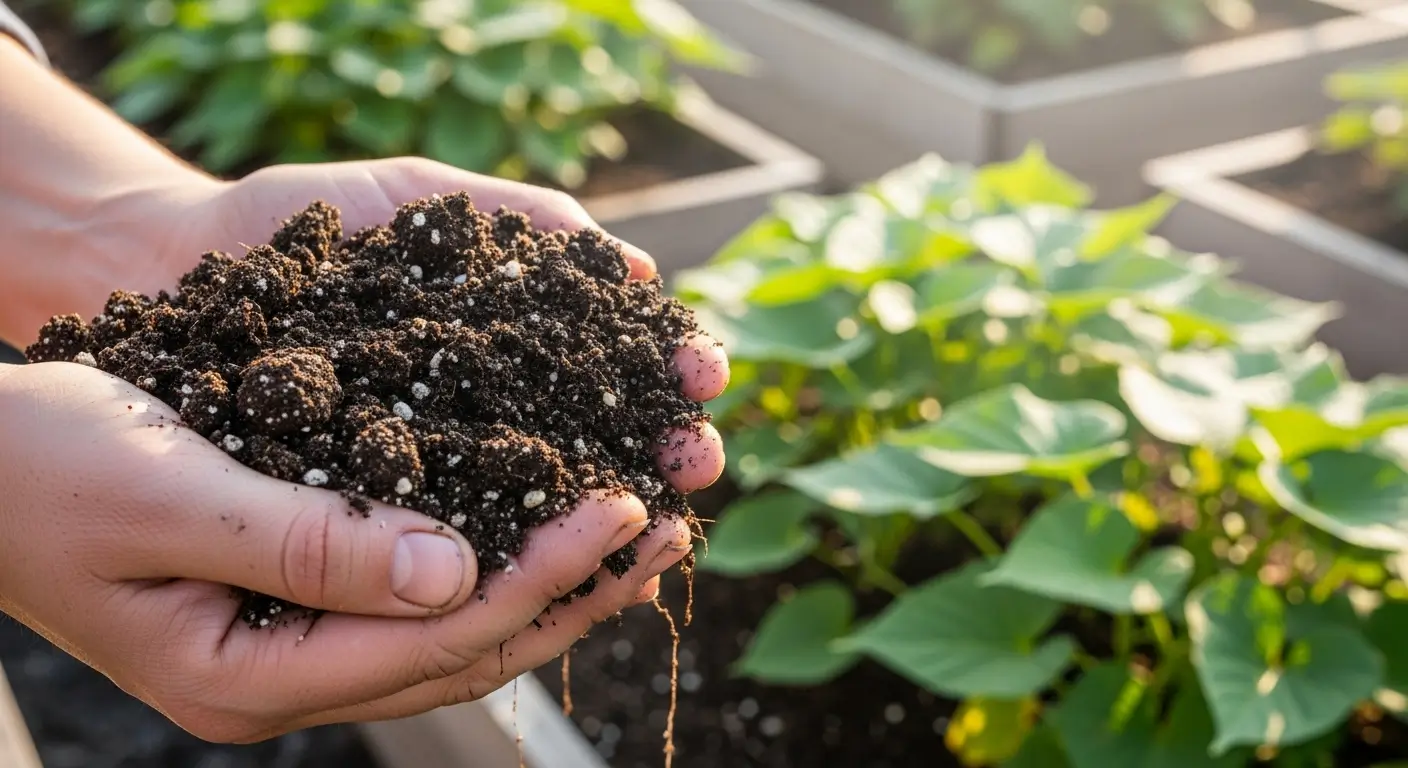
Learning how to cure sweet potatoes properly changed everything for me as a gardener. Picture this: you’re out in your garden, digging up those gorgeous sweet potatoes you’ve been babying all season. You feel like such a gardening rockstar, right? Well, here’s something nobody tells beginners – you’re only halfway done!
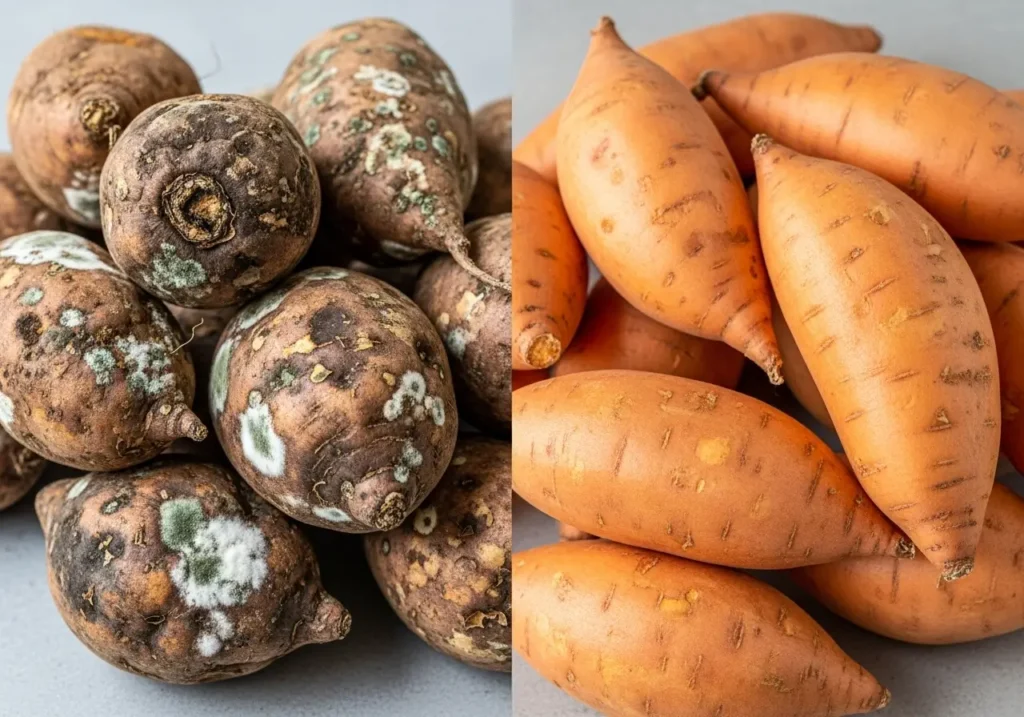
I learned this the hard way when I basically murdered half my first sweet potato harvest. Yeah, I was that person who just tossed them in the basement and called it a day. Three weeks later? Mushy, stinky disaster. Not my finest gardening moment, let me tell you.
That’s when my neighbor (the one who’s been gardening since dinosaurs roamed the earth) clued me in on this whole “curing” thing. Game changer doesn’t even begin to cover it.
Here’s what you need to know:
- You gotta cure them for 7-10 days at around 85-90°F with crazy high humidity
- This magic process makes them sweeter AND helps them last forever
- You can totally DIY this with stuff you probably already have
- Do it right, and these babies will last you 6-10 months
- Mess up the temperature or humidity, and you’ll be crying into your compost bin
Table of Contents
Why Curing Sweet Potatoes Matters More Than You Think
Look, I get it. Curing sounds like one of those old-school things your great-grandmother did that we don’t really need anymore. Like churning butter or washing clothes by hand. But trust me on this – curing sweet potatoes for storage is what separates the “wow, your sweet potatoes lasted until summer!” gardeners from the “mine all rotted by Christmas” crowd.
Here’s what’s happening during those crucial first week or so: Your sweet potatoes are going through their own little spa treatment. The warm, humid air helps heal any tiny cuts from when you dug them up (because let’s be honest, we all get a little aggressive with the shovel sometimes). Plus, some of those starches start turning into sugars, which means hello, extra sweetness!
I’ve done side-by-side tests because I’m nerdy like that. Uncured sweet potatoes? Dead within a month. Properly cured ones? Still perfect eight months later, sitting pretty in my basement like they’re mocking the uncured ones.
Understanding the Science: What Happens During Curing
Okay, don’t worry – I’m not gonna get all science-y on you. But knowing what’s going on really helped me nail this whole process.
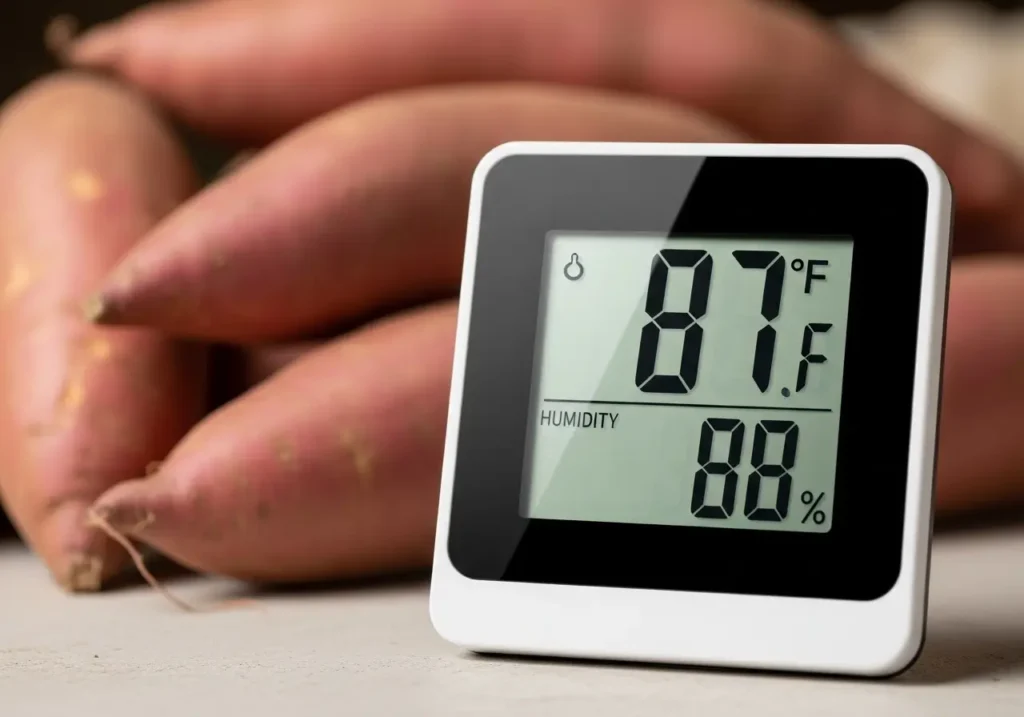
When you keep that sweet potato curing temperature right around 85-90°F with humidity that feels like you’re in a tropical rainforest, you’re basically telling your sweet potatoes, “Hey, time to get ready for the long haul!”
The heat and moisture wake up these little enzymes that start converting boring old starch into delicious sugar. That’s why cured sweet potatoes taste so much better than fresh ones – it’s like they’ve been naturally candy-coated from the inside.
At the same time, any little scrapes or dings on the skin start healing over. Think of it like a scab forming, but way less gross. This tough new skin becomes like armor against all the nasty stuff that wants to make your sweet potatoes go bad.
The coolest part? These things are still alive after you dig them up! They’re literally breathing and doing their sweet potato thing. Curing just puts them in the perfect chill-out mode for storage.
Setting Up Your Sweet Potato Curing Environment
Alright, here’s where it gets fun. You need that steamy humidity for curing sweet potatoes – we’re talking 85-90% humidity. Sounds impossible, right? Nope! I’ve got some tricks that’ll blow your mind.
Method 1: The Bathroom Setup (My Personal Favorite)
This sounds totally weird, but your bathroom is like the perfect sweet potato spa. I use my guest bathroom since nobody’s brushing their teeth in there every day.
I grab some wooden crates or cardboard boxes, line them with newspaper (because I’m fancy), and spread out my sweet potatoes so they’re not playing footsie with each other. Then I set up a little space heater on low – nothing crazy, just enough to keep things toasty. I own a thermometer in there because I’m obsessive about these things.
For humidity, I put a big shallow pan of water on the counter. Pro tip: taking hot showers twice daily naturally cranks up the moisture. It’s like a two-for-one deal!
You absolutely need one of those thermometer-humidity combo gadgets from the hardware store. Best ten bucks you’ll ever spend. Trust me.

Method 2: Creating a DIY Sweet Potato Curing Chamber
If you’re feeling crafty (or if your family’s tired of the bathroom being the sweet potato headquarters), you can build your own little curing box. I did this when I got ambitious with my harvest size.
Grab a big plastic storage container – like the 50-gallon ones that could probably hold a small child. Drill some quarter-inch holes near the top so your sweet potatoes can breathe. Set up some wire racks inside so air can move around, then here’s the genius part: Stick a small aquarium heater in a pan of water. Boom – heat and humidity in one shot.
Leave the lid cracked just a tiny bit for air circulation. I check on mine twice a day like they’re newborn puppies. Adjust the heat, add water, you know the drill.
How to Cure Sweet Potatoes: Step-by-Step Process
Okay, let’s walk through this together. I’ve been doing this for twelve years now, and I’ve got it down to a science (well, sort of).
You know what? Let me make this super easy for you. I’ve created this handy day-by-day tracker that shows exactly what to expect during the curing process. Just click on each day to see what you should be checking for – it’s like having me right there with you! I wish I’d had something like this when I was starting out.
🍠 Sweet Potato Curing Progress Tracker
Day 1: Getting Started
What to do: Set up your curing environment and place sweet potatoes with space between them.
- Brush off excess soil (don’t wash!)
- Check temperature and humidity levels
- Ensure sweet potatoes aren’t touching
- Look for any obvious damage
Pretty cool, right? Now let’s dive into the nitty-gritty details for each phase of the process.
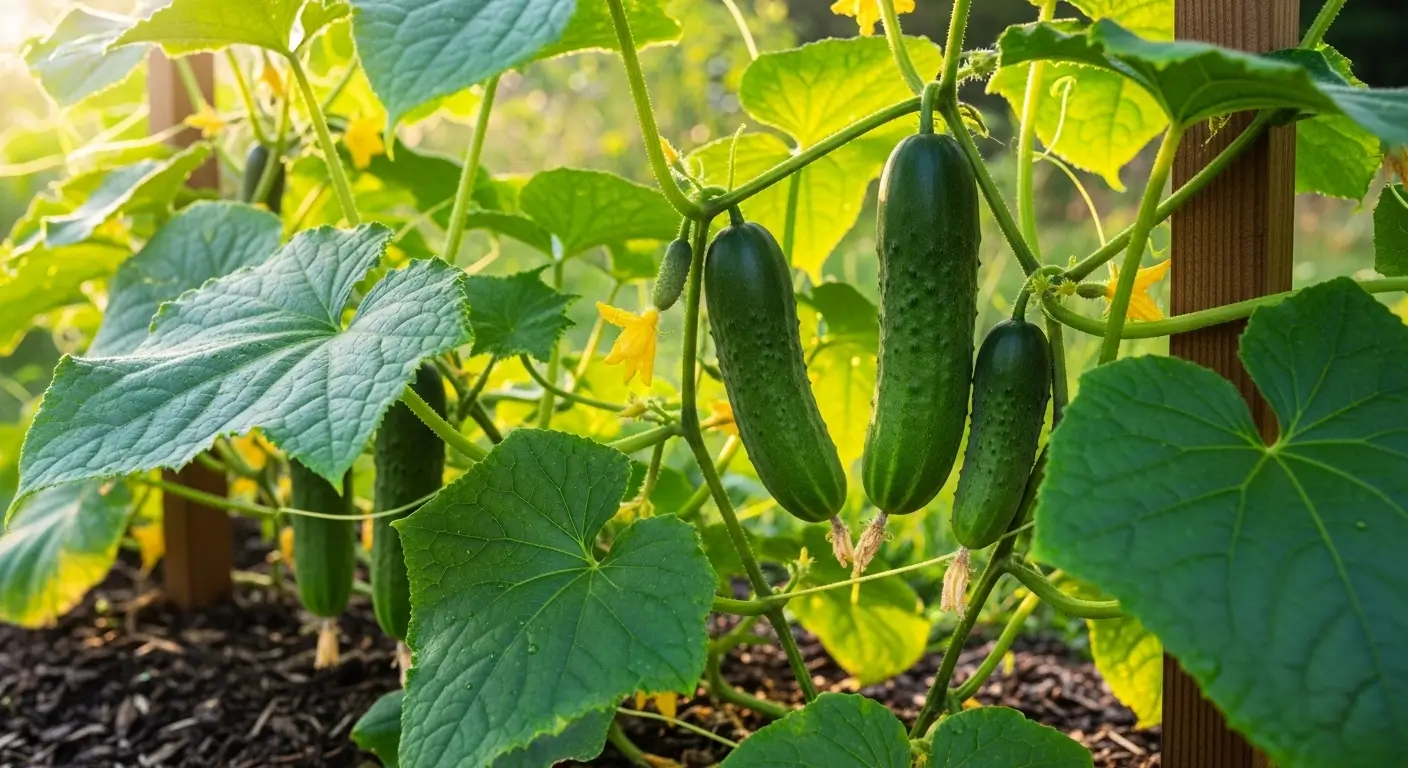
Day 1: Get Your Act Together. Don’t wait around after harvest – start this process right away! Gently brush off the dirt, but whatever you do, don’t wash them. I know it’s tempting, but water on the skin during curing is like inviting trouble to the party. Handle them like they’re made of glass because fresh sweet potato skin is surprisingly wimpy.
Days 1-3: Set It and Don’t Forget It. Get your sweet potatoes settled in their curing spot, making sure they’re not cuddling. Any rot that starts can spread faster than gossip in a small town. Keep that temperature steady at 85-90°F and crank up the humidity, as Iowa State University Extension recommends for proper curing conditions. If your humidity’s not high enough, add more water bowls or do the towel trick.
Days 4-7: Play the Waiting Game. This is where patience becomes a virtue. Check twice daily, but try not to obsess (easier said than done, I know). Look for any soft spots or funky smells – those are red flags. Your sweet potatoes should start looking less “just dug up” and more “ready for business.”
Days 8-10: The Final Countdown. By now, the skin should feel tougher when you gently poke it. Give them a little squeeze – they should feel solid all the way through. Any squishy ones need to go straight to the kitchen for immediate use.
Common Curing Mistakes (And How to Avoid Them)
Oh man, have I screwed this up in creative ways over the years! Let me save you from my pain.
Mistake #1: Being Impatient (Story of My Life) Seven days feels like seven years when you’re excited about your harvest. But cutting corners here is like leaving cookies in the oven for half the time – you’ll regret it later. Stick to the full 7-10 days even if you’re dying to move on.
Mistake #2: Playing Temperature Roulette. Sweet potatoes are drama queens about temperature. I learned this when my sketchy old heater made my curing room swing between 70-95°F like a mood ring. Half my batch threw a fit and got all weird on me. Now I use a decent thermometer and check it obsessively.
Mistake #3: Cramming Them In I get it – space is precious. But sweet potatoes need their personal bubble during curing. I space mine about an inch apart, minimum. If you need multiple layers, ensure air can still move around freely.
Transitioning from Curing to Long-Term Storage
Once your curing marathon is over, don’t just dump them straight into cold storage. These babies need a gentle transition, like easing into a cold swimming pool.
I move mine from the super-warm curing spot to a slightly cooler room (around 75°F) for a few days. Think of it as sweet potato decompression time. Then they’re ready for their long winter’s nap.
For the long haul, you want somewhere between 55-60°F with less humidity (around 75-80%). My basement is perfect, but a fabulous closet works too. The key is no crazy temperature swings – sweet potatoes hate drama.
I wrap each one individually in newspaper like little presents and tuck them into wooden crates. I check on them once a month, pulling out any that are starting to look questionable. If you’re done right, these things will last until you’re sick of sweet potatoes (if that’s even possible).
Troubleshooting Your Curing Setup
Even when you think you’ve got everything figured out, stuff happens. Here’s how to fix the most common hiccups:
Problem: Humidity’s Being Stubborn Add more water dishes, throw some wet towels near your heat source, or mist the air (never the sweet potatoes directly – they hate that). I’ve found that wet towels near the heater work like magic.
Problem: Temperature Going Haywire. Turn down your heater or move it further away. Sweet potatoes don’t like sudden temperature shocks – it makes them cranky.
Problem: Mold Showing Up. This usually means too much moisture or air that’s not moving enough. Crank up the ventilation and dial back the humidity a smidge. Pull out moldy ones immediately – don’t let them ruin the party for everyone else.
Seasonal Considerations and Timing
Timing this whole thing with the seasons is essential. Here in Illinois, I usually dig up my sweet potatoes in late September or early October, right before Jack Frost crashes the party. Perfect timing because my furnace isn’t running full blast yet, so it’s easier to keep that warm curing temperature without fighting my heating system.
If you’re harvesting when it’s still warm outside, you might be able to cure in your garage or shed. Just keep an eagle eye on conditions and be ready to move indoors if Mother Nature gets moody.
Getting your harvest timing right is super crucial for good curing results. If you’re unsure when to harvest sweet potatoes, it’s worth checking out because timing matters. Too early and they won’t cure well, too late and they might already be going downhill.
Beyond Basic Curing: Advanced Tips
After years of obsessing over this process, I’ve picked up some tricks that really make a difference. Before curing, I sort my sweet potatoes by size because the big guys sometimes need an extra day or two.
I discovered something weird: sweet potatoes with minor battle scars from pests (you know, the stuff covered in my sweet potato pest control guide) actually cure better than perfect ones. It’s like their healing response is already kicked into gear.
I’m also that nerd who keeps detailed notes every year about which varieties do best with my setup. Beauregard and Georgia Jet are my superstars, but some of the purple ones are a bit more high-maintenance.
Your Sweet Potato Success Story Starts Now
Learning how to properly cure sweet potatoes was one of those game-changing moments in my gardening journey. What used to be this frustrating cycle of harvest excitement followed by storage heartbreak became this reliable system that keeps us in homegrown sweet potatoes practically year-round.
Those 7-10 days of babying them during curing? Totally worth it when you’re pulling perfect sweet potatoes out of storage in February while your neighbors are buying sad grocery store ones.
Look, I’m not gonna lie – my first attempts were pretty rough. Yours might be too, and that’s totally fine! The important thing is to start. You’ll get a little better at reading what your sweet potatoes need every season.
If you want the full scoop on growing these amazing things from start to finish, definitely check out my complete sweet potato growing guide. It’s got everything from planting slips to this curing adventure.
So, have you tried curing sweet potatoes before? I’m dying to hear your stories – the successes, the epic fails, all of it! Drop me a comment and let’s swap some sweet potato war stories. After all, we’re all just figuring this out together, one tuber at a time!
Sweet Potato Curing Frequently Asked Questions
How long does it take to cure sweet potatoes properly?
Sweet potatoes need 7-10 days to cure properly at 85-90°F with 85-90% humidity. This timeframe allows the skin to toughen and heal minor cuts while converting starches to sugars for better flavor and storage life.
What temperature and humidity do I need to cure sweet potatoes?
The ideal conditions for curing sweet potatoes are 85-90°F temperature with 85-90% humidity. You can achieve this using a bathroom setup with space heater and water pans, or a DIY container with aquarium heater and proper ventilation.
Can I skip the curing process and store sweet potatoes immediately?
No, skipping the curing process leads to storage failure. Uncured sweet potatoes typically develop soft spots and rot within 3-4 weeks, while properly cured sweet potatoes can last 6-10 months in storage.
How do I know when my sweet potatoes are done curing?
Sweet potatoes are properly cured when the skin feels noticeably tougher and less shiny after 7-10 days. They should feel firm throughout with no soft spots, and any minor cuts from harvesting should be healed over.