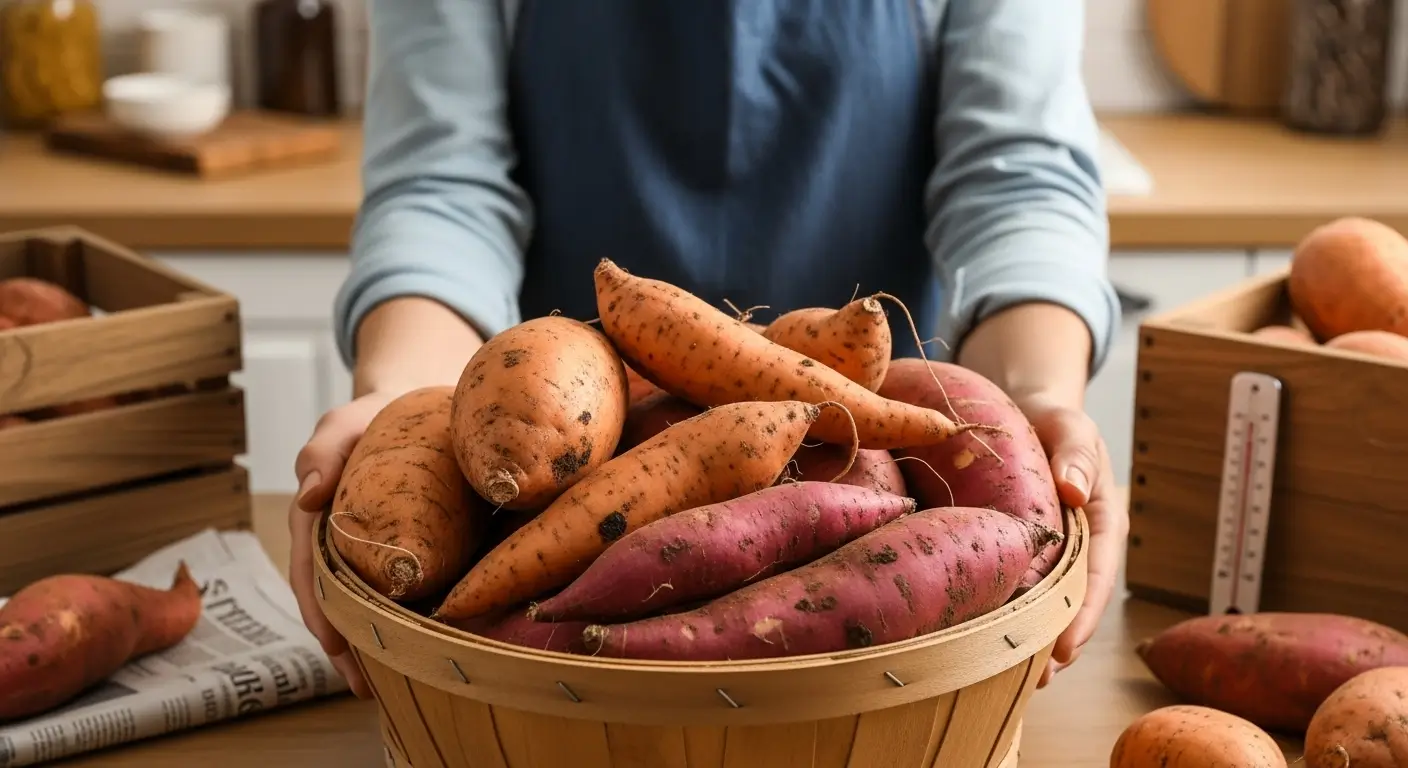
Okay, so picture this: it’s a crisp fall day, and I’m in my garden, basically treasure hunting. I’m carefully brushing dirt off what I think is gonna be a tiny sweet potato, and BAM – this massive orange beauty emerges that’s almost the size of a football! I swear I squealed like a kid on Christmas morning. That was seven years ago, and I’ve been completely obsessed with growing sweet potatoes ever since.
If you’ve never grown your sweet potatoes, you’re seriously missing out. Not only are they packed with all the good stuff (hello, beta-carotene!), but they’re also ridiculously versatile in the kitchen. Plus – and this is the best part – they store like champions when you cure them right. I’m talking months of homegrown goodness from just one growing season!
I’m gonna walk you through everything I’ve learned about how to grow sweet potatoes, and trust me, it’s way easier than you think. Whether you’ve got a huge backyard or you’re working with just a few pots on your balcony, you can totally do this. And here’s something most guides won’t tell you upfront: you can expect to get 3-5 pounds of sweet potatoes per plant! I mean, that’s a pretty sweet deal, right?
Table of Contents
How to Grow Sweet Potatoes: Understanding the Basics
What the Heck Are Sweet Potato Slips?
Alright, this is where things get a little weird if you’re new to sweet potatoes. You can’t just grab one from your kitchen and plop it on the ground like you would with regular potatoes. Nope, sweet potatoes have their own special thing called “slips.”
Think of slips as baby sweet potato plants that literally sprout out of the sides of a whole sweet potato. It’s honestly pretty cool to watch – like something out of a sci-fi movie. These little green shoots grow their own roots, and that’s what you plant in your garden.
I tried the “just stick a sweet potato in the dirt” method in my first year. Spoiler alert: it was a complete disaster. Don’t be like rookie me – you need those slips with their cute little root systems to have any chance of success.
There’s also something called vine cuttings, which are basically pieces of the sprawling vines that you can root later in the season. But honestly? Start with slips. They’re like training wheels for sweet potato growing.
Picking Your Sweet Potato Squad
Not all sweet potatoes are created equal, and after trying way too many varieties (my family was getting sick of sweet potato everything), here are my ride-or-die favorites:
Beauregard is like the golden retriever of sweet potatoes – reliable, friendly, and never lets you down. You see that classic orange sweet potato everywhere, but homegrown ones are a million times better. They store forever (seriously, I’ve kept them for eight months), and they’re great for literally everything.
Georgia Jet is my hero for those of us dealing with shorter growing seasons. This little speed demon is ready to harvest in just 90 days instead of the usual 100-120. It’s saved my bacon more times than I can count when fall decides to show up early.
Purple sweet potatoes are my latest obsession. They’re gorgeous, loaded with antioxidants, and taste slightly nuttier than the orange ones. Fair warning, though – depending on your dinner guests, they’ll turn your dishes purple, which is either remarkable or alarming.
Pro tip: Japanese varieties are drier and fluffier (perfect for roasting), while American varieties are moister and better for mashing. It’s all about what you wanna do with them!
Climate Reality Check
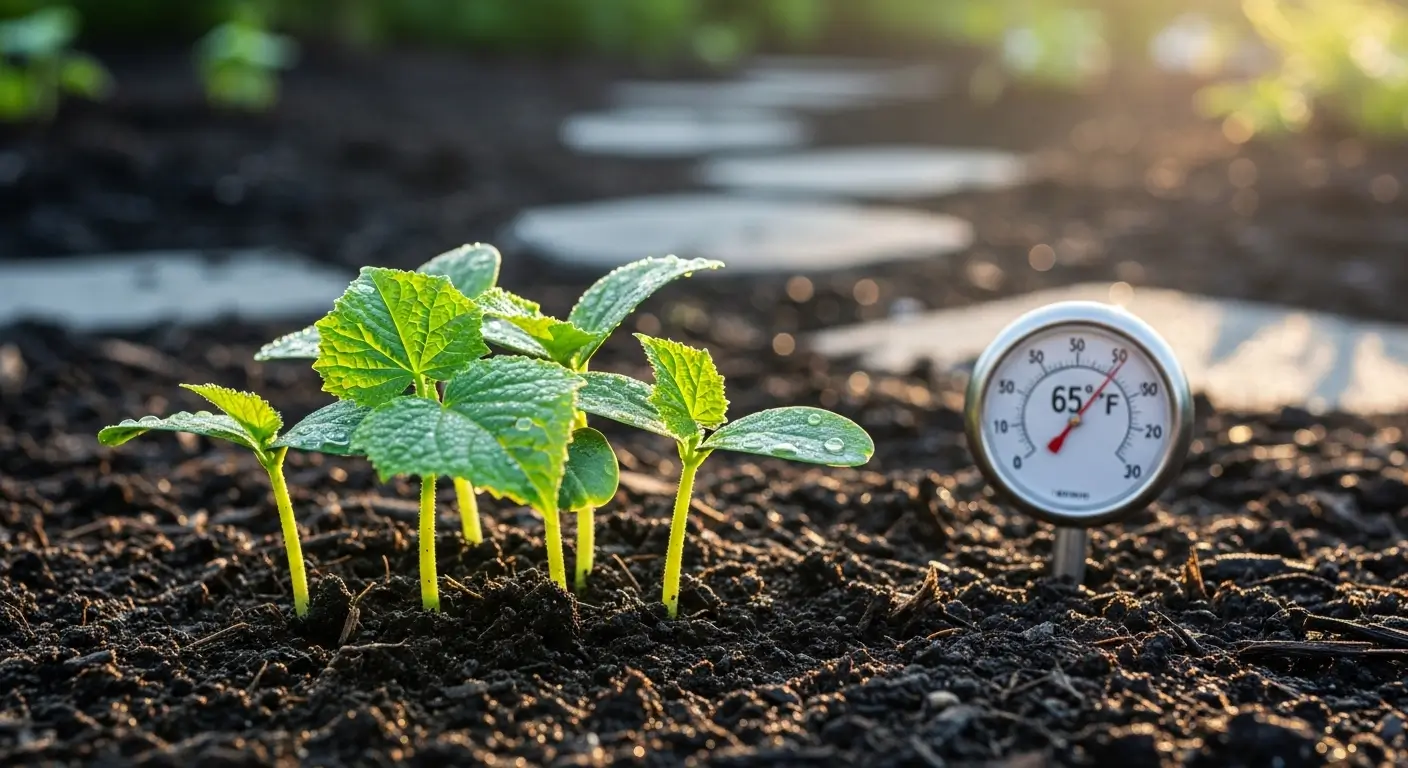
Let’s be real – sweet potatoes are total heat lovers. They want warm soil (at least 65°F) and prefer temps between 65-95°F. Basically, they’re the tropical vacation enthusiasts of the vegetable world.
If you’re in Zones 8-11, congrats! You’ve won the sweet potato lottery. You can grow them year-round and live your best sweet potato life.
For those of us in Zones 5-7 (hey there, fellow Midwesterners!), we gotta get creative. I start my slips inside in March, use every season-extending trick in the book, and choose fast-maturing varieties. It’s like a fun puzzle to solve.
Even Zones 3-4 folks can get in on this action with containers and maybe a greenhouse setup. Don’t let anyone tell you it’s impossible!
Check your exact growing zone on the official USDA Plant Hardiness Zone Map to determine your ideal planting timeline.
Starting Your Sweet Potato Slips (The Fun Part!)
The Water Method (AKA The Kitchen Science Experiment)
This is hands down the most satisfying way to grow slips because you can watch the whole magic show unfold. I’ve been doing this for years and still get excited when those first little green shoots pop out.
Here’s what you need: some healthy sweet potatoes (organic ones work best since they haven’t been treated to prevent sprouting), clear containers (mason jars are perfect), toothpicks, and patience (this is the hard part).
Stick 3-4 toothpicks around the middle of your sweet potato like you’re making a tiny porcupine. Then suspend it in your jar so that about a third is sitting in water. Pointy end goes down, but honestly, I’ve screwed this up before, and they still worked.
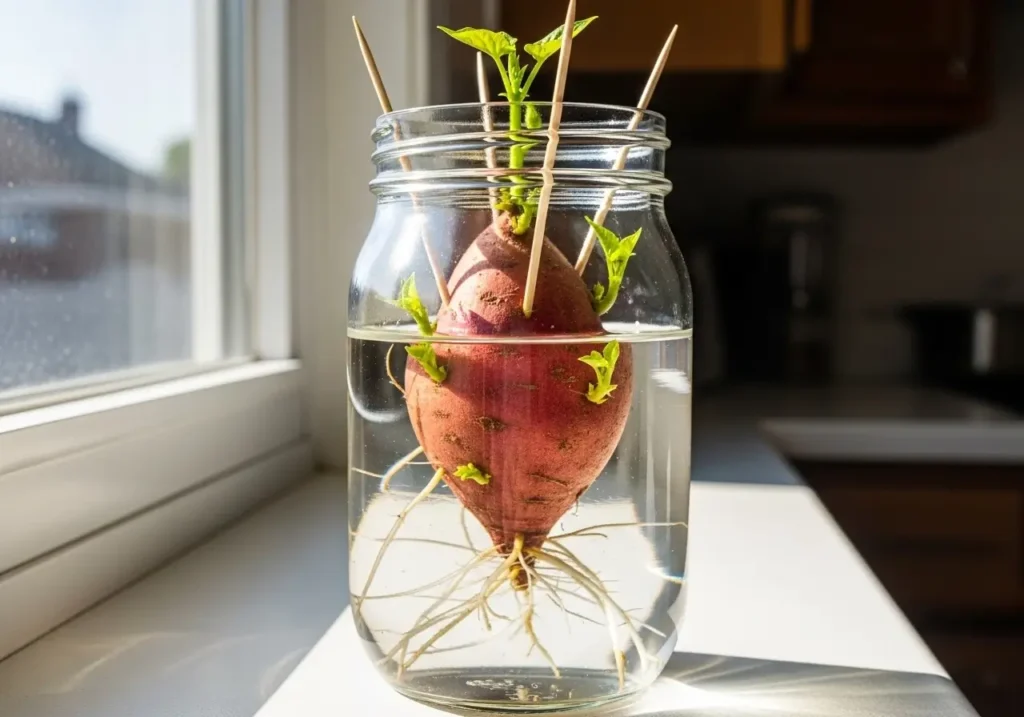
Find a warm, bright spot – I use the top of my fridge because it’s consistently toasty. Change the water every few days (nobody likes stagnant water), and in 4-6 weeks, you’ll start seeing shoots emerge. It’s like Christmas morning when it happens!
When those shoots are 4-6 inches tall with their own little roots, carefully twist them off. If they come away easily with roots attached, they’re ready to become independent plants!
The Soil Method (For Overachievers)
While the water method is more fun to watch, I actually get better results with the soil method. The roots are stronger, and there’s less drama when you transplant them.
Fill some shallow containers with light potting mix – I do peat moss, vermiculite, and compost. Bury your sweet potatoes sideways with about an inch of soil on top. Keep it moist (not soggy!) and warm, around 75-80°F.
The beauty of this method is that your slips are already used to growing in soil, so they don’t throw a tantrum when you move them outside.
When Things Go Wrong (It Happens!)
Let me save you some heartache by sharing my biggest fails. If you don’t see any action after three weeks, your sweet potato might be too old or treated with chemicals. Try a different one and make sure your setup is consistently warm.
If your sweet potato starts rotting (been there!), you have too much moisture or insufficient air flow. I learned this lesson the hard way when I lost an entire batch to nasty mold.
Weak, stretchy growth usually means not enough light. Sweet potato slips are like teenagers – they need their sunshine to thrive properly.
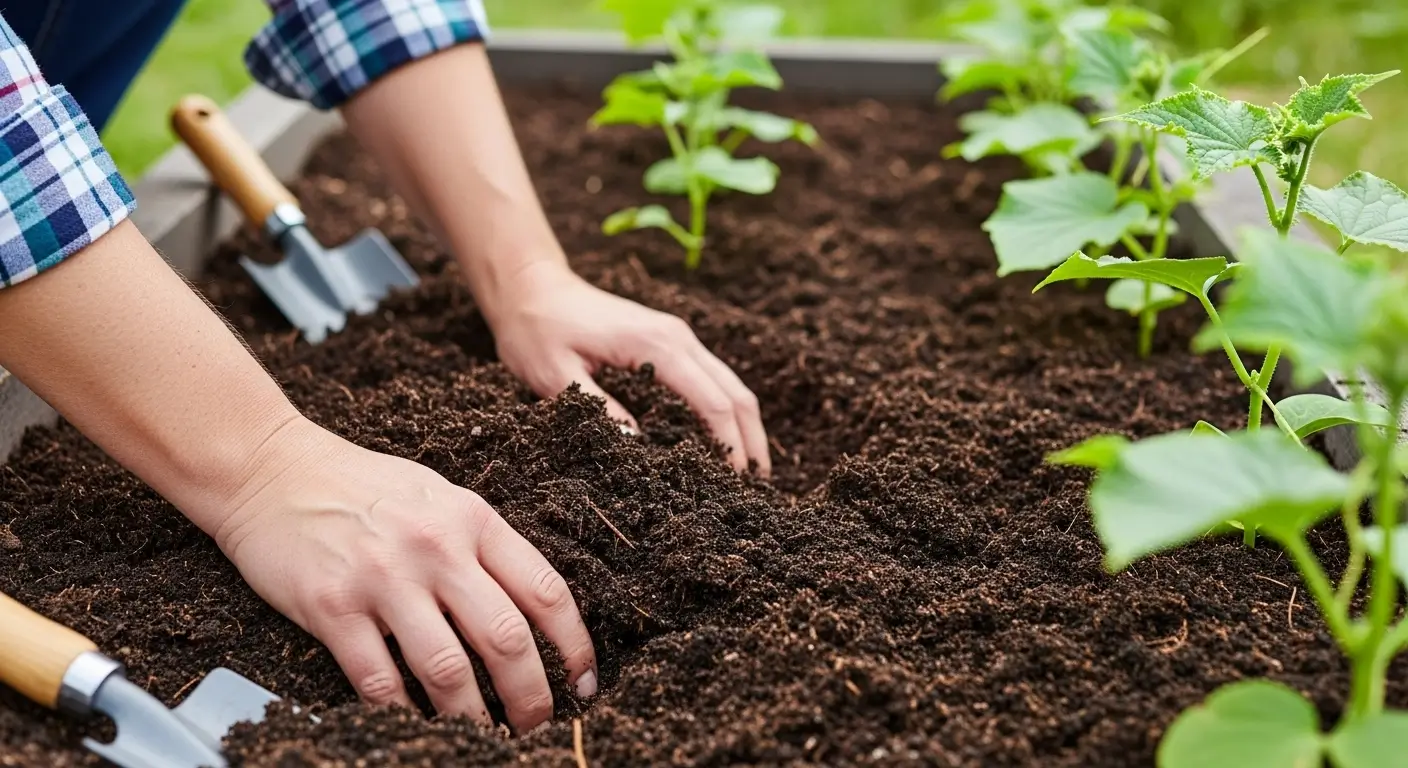
Setting Up Your Sweet Potato Paradise
Soil Talk (Don’t Worry, I’ll Keep It Simple)
Sweet potatoes aren’t super picky, but they absolutely hate wet feet. Think sandy loam with excellent drainage. My original soil was heavy clay that could basically be used to make pottery, so I spent years adding compost and sand to fix it.
They like slightly acidic soil (pH 5.8-6.2), and here’s a pro tip: don’t use fresh manure! It makes them grow tons of leaves but skimps on the sweet potatoes. Stick with well-aged compost instead.
If your soil is terrible, don’t panic. I’ve been slowly improving mine for years, and now my sweet potatoes are happy campers.
Raised Beds Are Game Changers
Raised beds have been absolute lifesavers for my sweet potato game. The soil warms up faster in spring, drains better, and I can control exactly what goes into the growing mix.
I make mine at least 8-10 inches tall and fill them with a custom blend: one part existing garden soil, one part compost, one part coarse sand. It’s like making a fancy cocktail, but for plants.
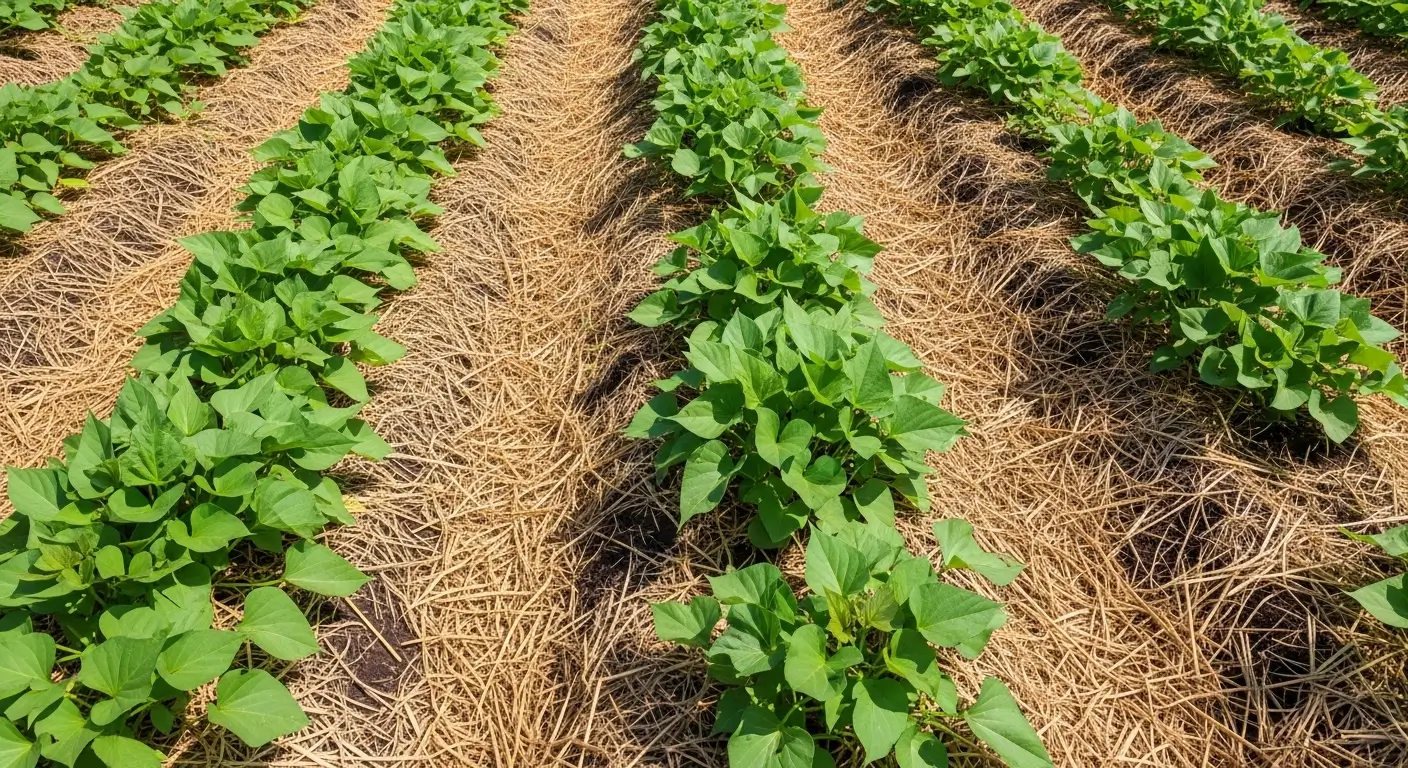
Mulching is super essential, but there’s a strategy. I start with black plastic early in the season to warm things up, then switch to straw once it gets consistently warm. Best of both worlds!

Container Growing (For the Space-Challenged)
Don’t have a big yard? No problem! I’ve grown amazing sweet potatoes in containers, and it’s actually easier in some ways. You need big enough pots – I’m talking 20 gallons minimum, but bigger is always better.
I’ve used everything from fabric grow bags to old whiskey barrels (which look pretty cool, by the way). Just ensure drainage holes because waterlogged sweet potatoes are dead sweet potatoes.
The cool thing about containers is you can move them around to find the perfect sunny spot, and the trailing vines look pretty awesome cascading over the sides.
Planting Time! (The Exciting Part)
Timing Is Everything
This is where patience really pays off. Sweet potatoes are total babies when it comes to cold – even a little chill will make them sulk for weeks. Wait until your soil is consistently 65°F and there’s zero chance of frost.
Here in Zone 5b, that usually means late May to early June. I know it’s tempting to plant earlier (especially when garden centres are selling slips in early May), but trust me on this one. Better to wait and have happy plants than rush and have stressed ones.
Southern friends can often start in April, while northern folks might need to wait until mid-June. I always keep row covers handy just in case Mother Nature throws us a curveball.
All this timing talk getting confusing? Yeah, I totally get it! That’s why I made this little calculator to take the guesswork out of your sweet potato timeline. Just pick your zone and variety, and you’ll get your personalized planting schedule with actual dates:
See? Way easier than trying to count backwards from frost dates and doing math in your head! Plus, you get to see exactly how many pounds of sweet potatoes you’re gonna harvest – which is honestly my favorite part
The Actual Planting Process
After years of experimenting, I’ve got this down to a science. I plant my slips deeper than most guides recommend – burying about two-thirds of the stem. This encourages more roots to form along the buried part, which means more sweet potatoes!
Space them 12-18 inches apart in beds, or 12 inches in raised beds where every square foot counts. In containers, one slip per 20-gallon pot works great, though you can squeeze two in bigger containers if you’re feeling ambitious.
Plant them at a slight angle instead of straight up. It sounds weird, but it gives more surface area for root development, and my harvests have been consistently better this way.
Playing Well with Others (Companion Planting)
Sweet potatoes are pretty social and get along with most garden neighbors. I love planting oregano and parsley nearby – they don’t compete for space, and their smell might help keep pests away.
Bush beans are fantastic companions because they add nitrogen to the soil without making the sweet potatoes go crazy with leaf growth. I plant them along the edges where they won’t get tangled up in the vines.
Avoid tomatoes and sunflowers, though. I’ve noticed my sweet potatoes always seem stunted when planted near these guys, and while I can’t prove why, I’ve seen it happen enough times to keep them separate.
Keeping Your Sweet Potatoes Happy
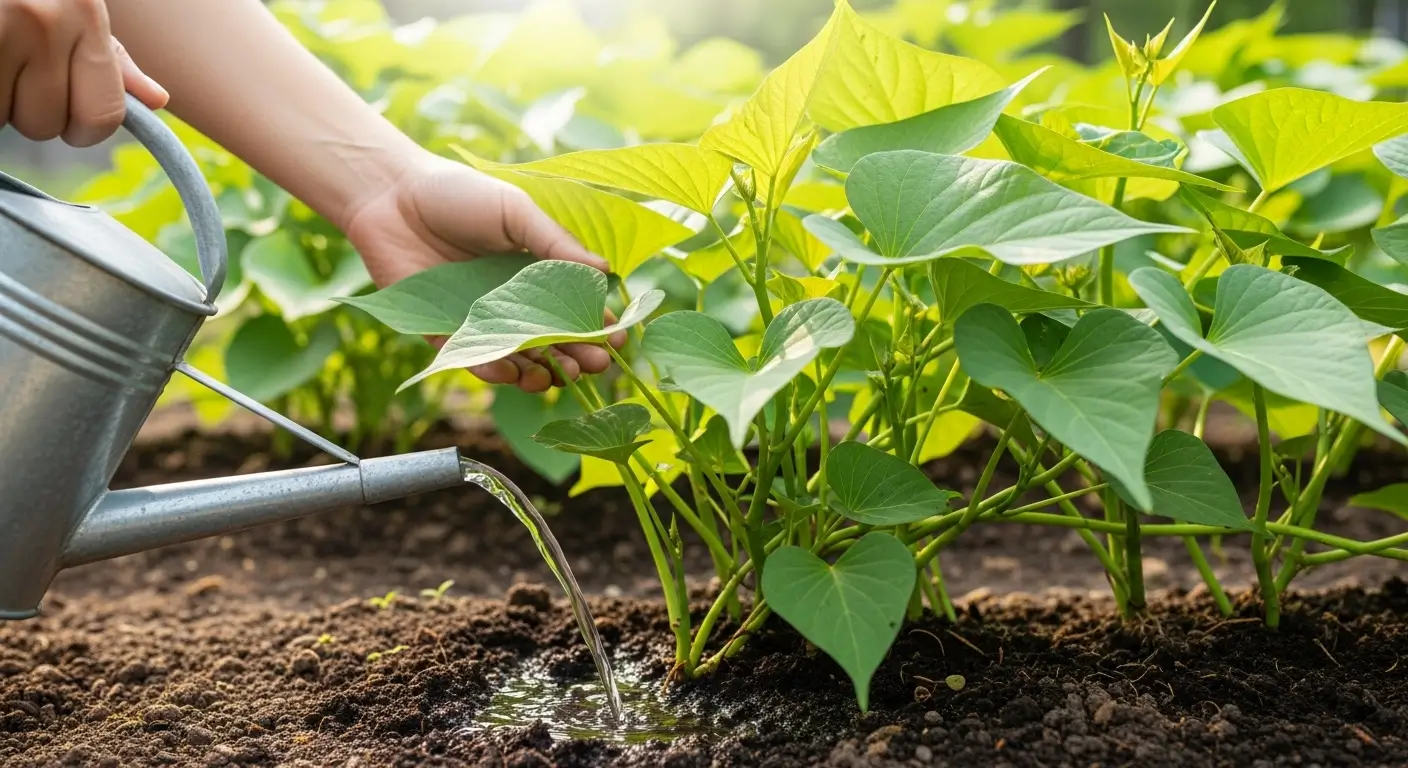
Watering Without Overdoing It
Sweet potatoes want consistent moisture, but they’re not fans of soggy soil. It’s like that friend who wants to hang out regularly but needs their space too. During the first few weeks, I water deeply twice a week, giving them about 1-2 inches total.
Once the vines start spreading (usually 3-4 weeks in), I water less frequently but give them more each time. Deep, infrequent watering encourages the roots to grow down instead of staying shallow.
I finally invested in drip irrigation, and wow, what a difference! The plants get steady moisture without wet leaves, which cuts down on disease problems. Plus, I don’t have to stand there with a hose every few days.
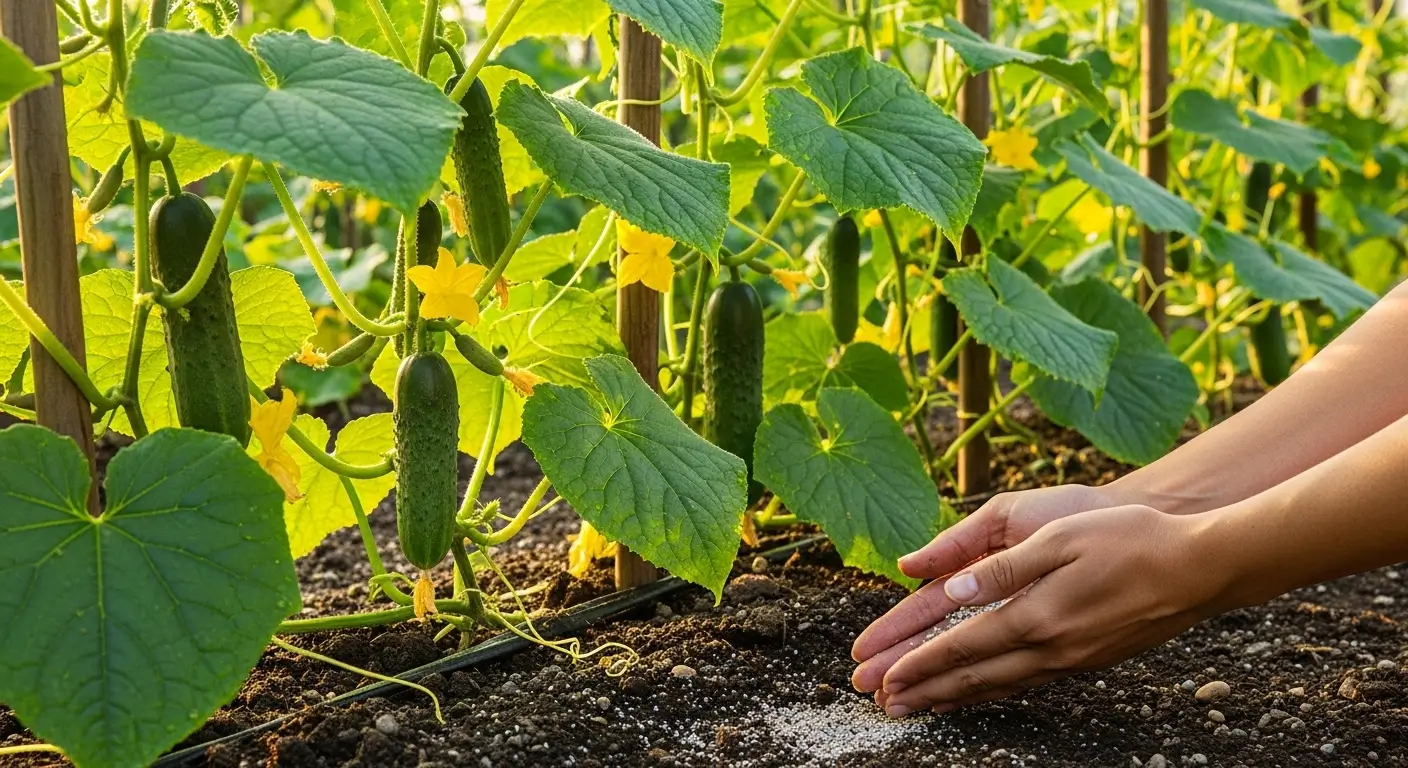
Feeding Your Plants (But Not Too Much!)
Here’s where many people mess up – sweet potatoes don’t need much fertilizer, and too much nitrogen hurts your harvest. High nitrogen makes them grow beautiful, lush vines, but skimps on the actual sweet potatoes underneath.
I prep my beds with compost and aged manure before planting, then basically leave them alone nutrition-wise. Around 6-8 weeks after planting, I might side-dress with some wood ash or kelp meal for extra potassium, which helps with root development.
Compost tea every 3-4 weeks is my secret weapon – it provides gentle nutrition without overstimulating growth. I make my own with compost, worm castings, and kelp meal.
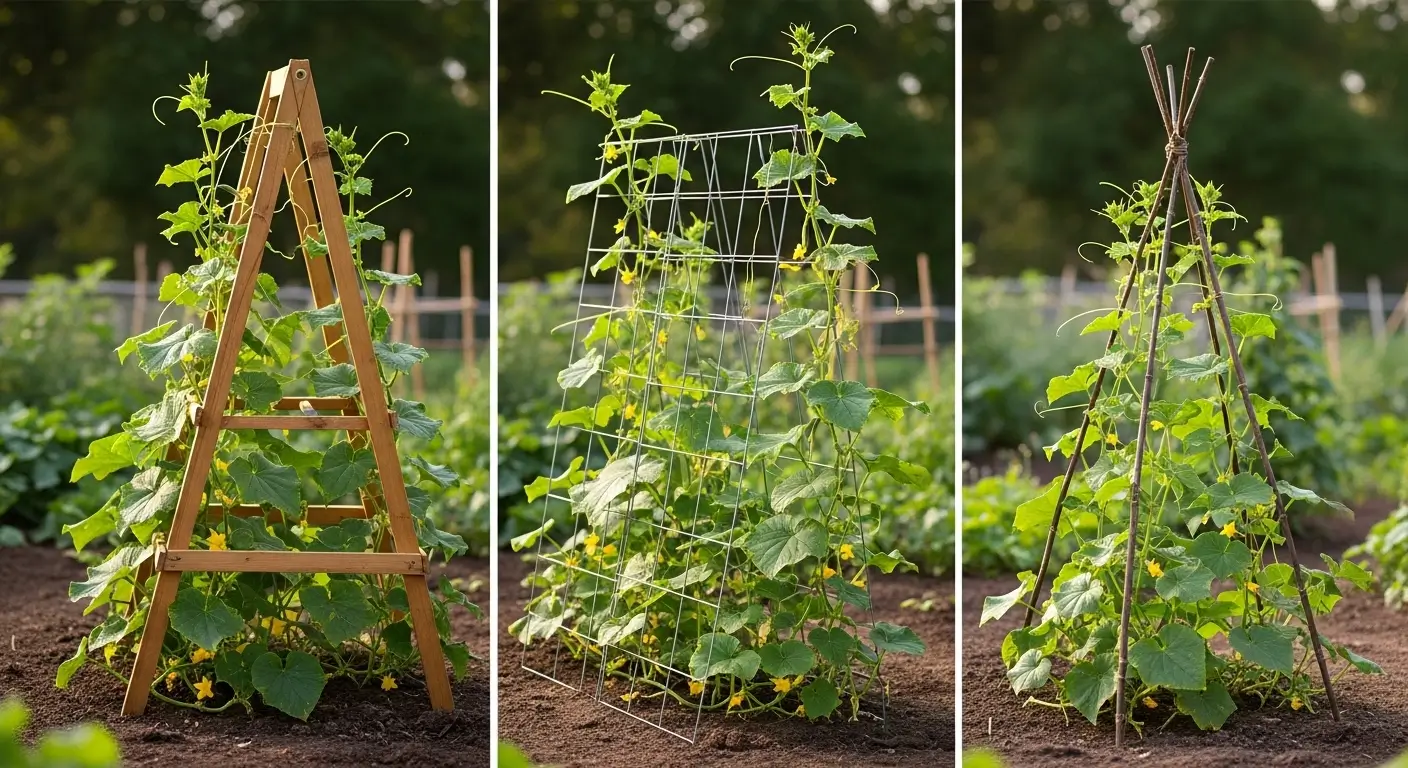
Dealing with the Vine Takeover
Fair warning: sweet potato vines can spread 3-4 feet in every direction. They’re like friendly green monsters that want to take over your entire garden. In small spaces, I train them up trellises or let them cascade from raised beds.
You can do some light pruning if they’re getting out of control, but don’t go crazy with the scissors. Those leaves are working hard to make energy for your sweet potatoes!
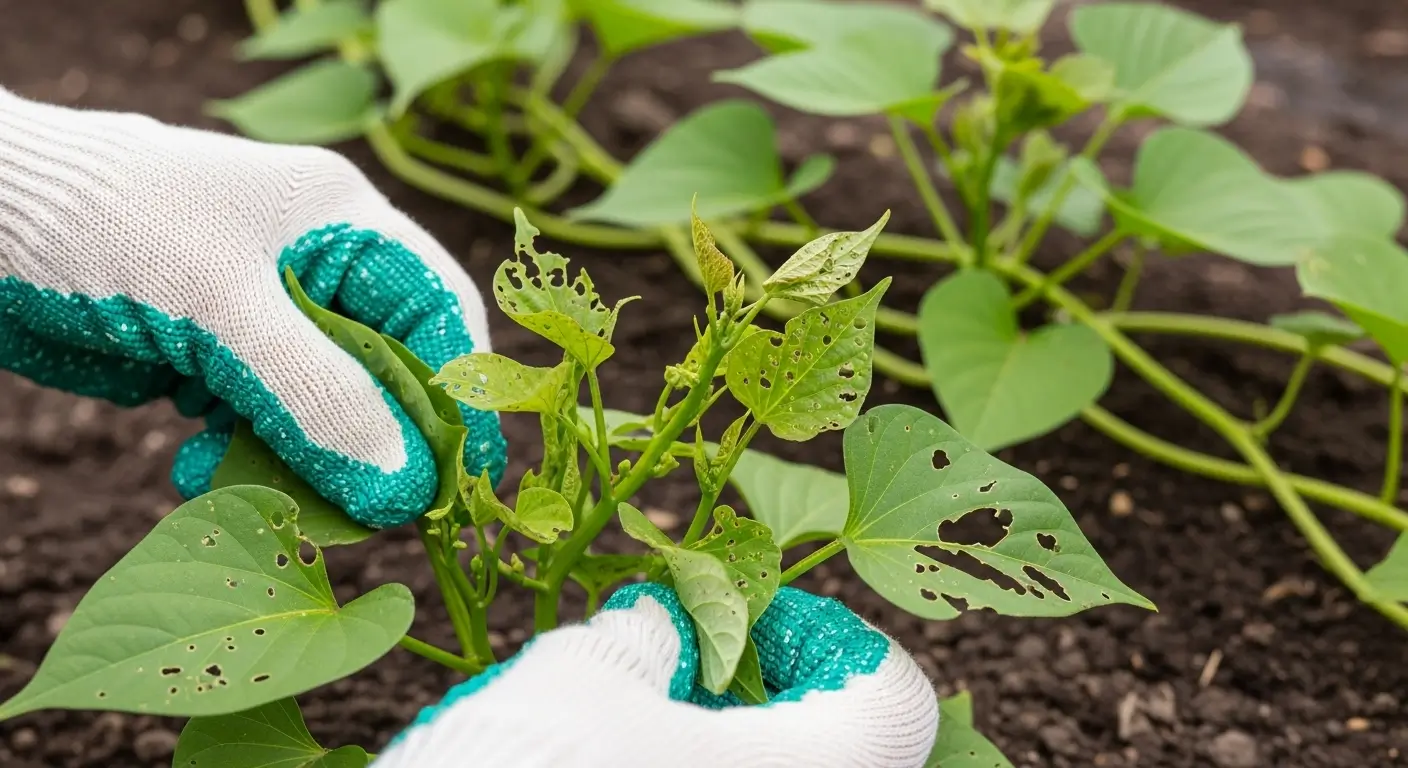
Battling the Bad Guys (Pests and Diseases)
The Usual Suspects
Sweet potatoes don’t have too many pest problems, but the ones they get can be real troublemakers. Wireworms are my nemesis – these little soil-dwelling jerks tunnel through your developing sweet potatoes like they’re mining for gold.
The best defense is not planting sweet potatoes where there used to be grass, since that’s where wireworms like to hang out. Beneficial nematodes work well too, though they’re like hiring tiny invisible bodyguards for your plants.
Flea beetles can be devastating on young plants, creating tons of tiny holes in the leaves. Row covers for the first month or so work great – it’s like giving your baby plants a protective blanket.
Disease Drama
Black rot is probably the scariest disease for sweet potatoes. It shows up as dark, gross lesions on the roots, and prevention is way easier than treatment. Start with healthy slips, keep things well-drained, and rotate your crops.
Good air circulation helps prevent most fungal problems. This means proper spacing, avoiding overhead watering, and keeping weeds under control so air can move around freely.
Harvest Time! (The Best Part)
Knowing When They’re Ready
This takes some practice, but most varieties need 90-120 days from planting. I don’t just go by the calendar, though – I do some detective work by carefully digging around the base of a few plants to check progress.
Start checking around day 90 by gently brushing soil away from the base. You’re looking for roots that are at least 2-3 inches across and have that proper sweet potato shape.
The weather is super important here. Always harvest before the first frost because cold damage ruins everything. If an early frost threatens, I’ll harvest slightly immature sweet potatoes rather than risk losing the whole crop.
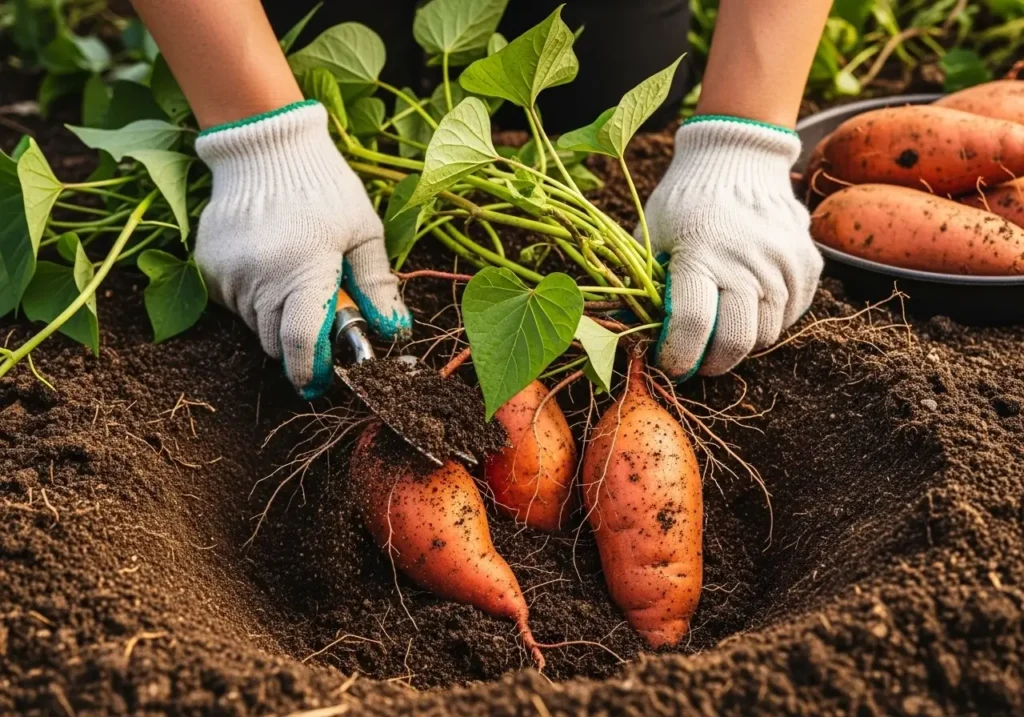
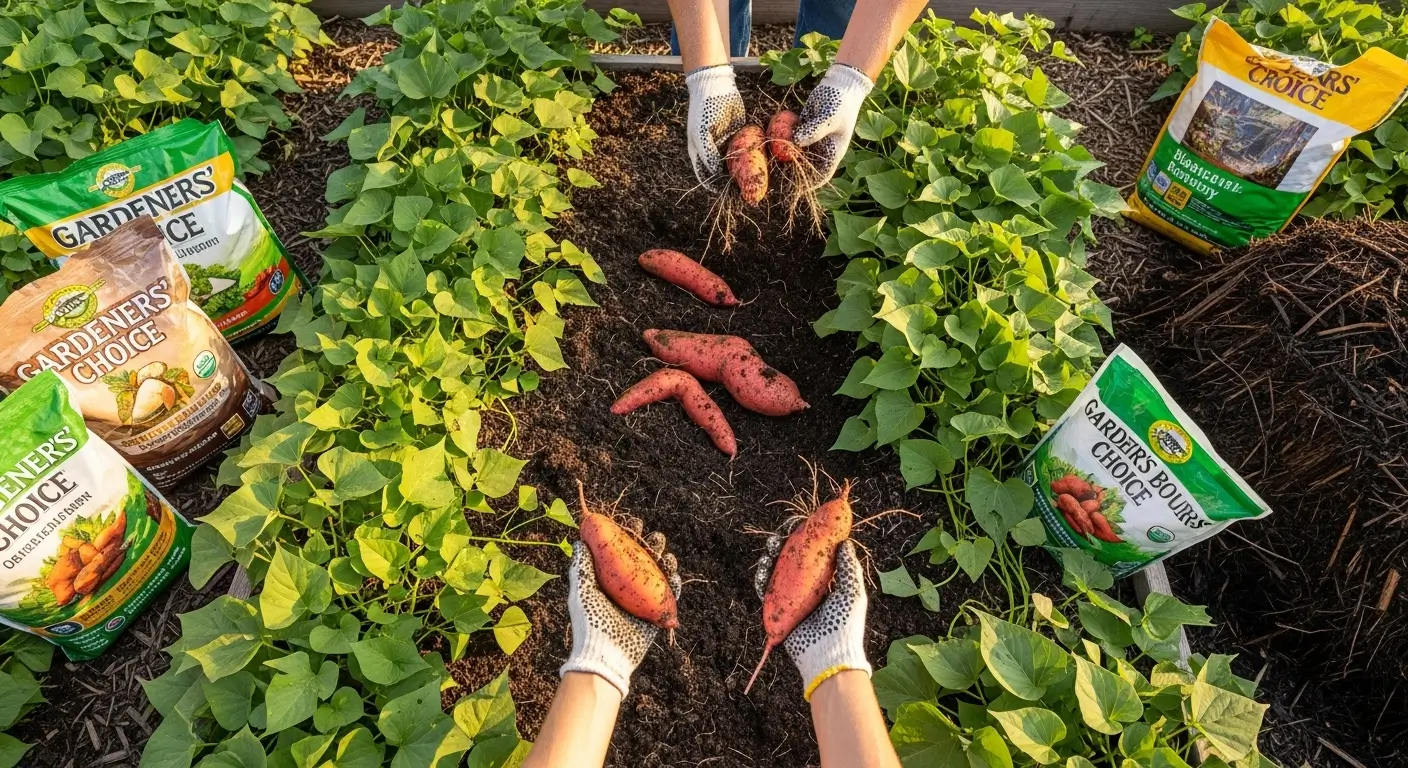
The Great Dig
Harvesting sweet potatoes requires patience and a gentle touch. Think of them as fragile treasures, not potatoes you can rough up. I use a garden fork to carefully loosen soil around each plant, working from the outside in.
I dump the whole thing for container plants and sift through the soil like I’m panning for gold. It’s fun; you usually find more sweet potatoes than you expected!
Handle them like eggs because any bruising or cuts give bacteria a way in, which leads to rot during storage.
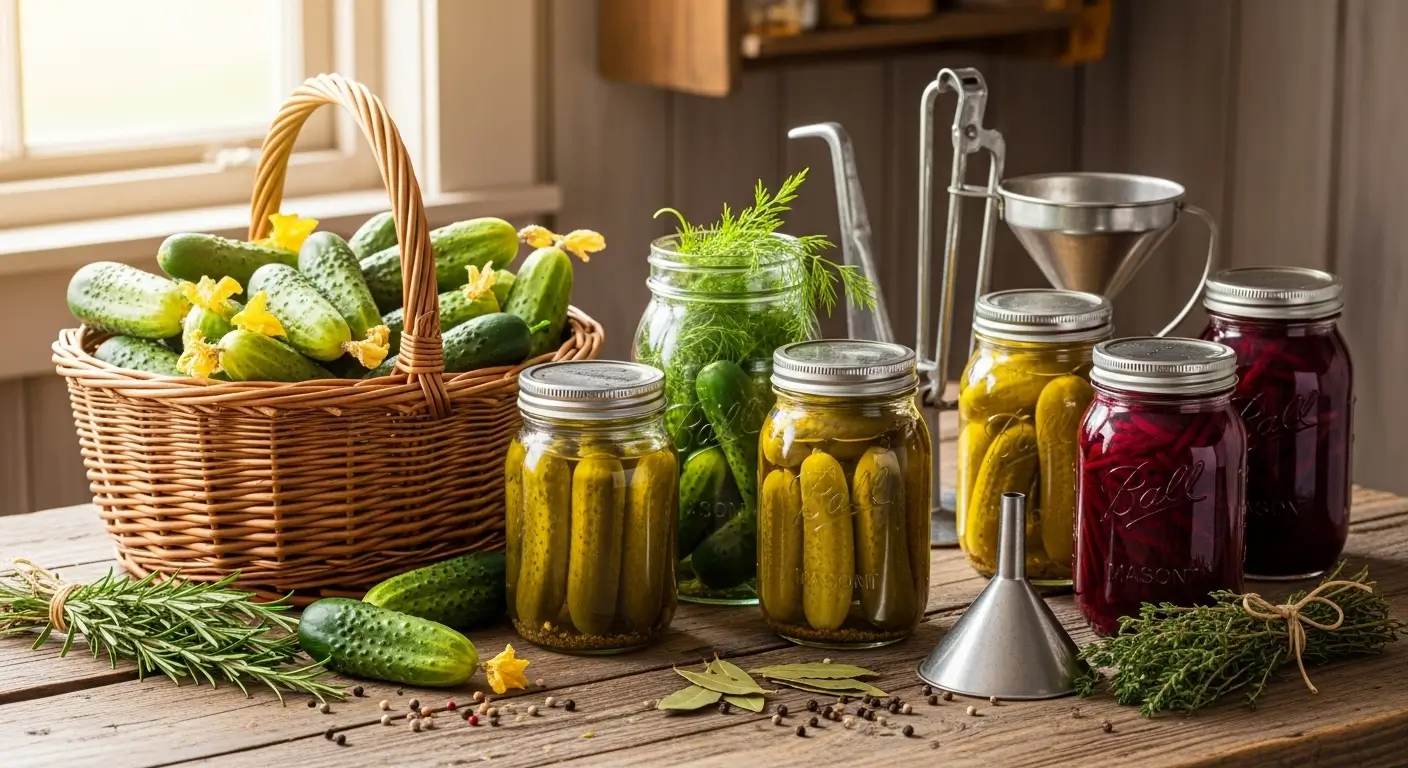
The Curing Secret
Here’s the magic trick most people skip: proper curing. This process toughens up the skin and converts starches to sugars, making your sweet potatoes sweeter and helping them store way longer.
I cure mine at 80-85°F with high humidity for about a week. My setup is super simple – a big cardboard box lined with damp towels, sitting near my water heater. A small humidifier keeps things properly humid.
After curing, I move them to cooler storage (around 55-60°F). Properly cured sweet potatoes are kept for 6-10 months, which means they are homegrown sweet potatoes all winter long!
Getting the Most Bang for Your Buck
Maximizing Your Harvest
After tracking my harvests for years, I consistently get 3-5 pounds per plant when everything goes right. In my 4×8 raised bed, I plant about 12-15 slips and usually harvest 40-60 pounds. That’s enough to feed my family all winter with plenty to share with neighbors!
The most significant factor in yield is soil prep. I spend serious time in spring working compost into my beds, creating loose, rich soil that lets the roots develop fully.
Consistent watering throughout the season makes a huge difference too. Sweet potatoes that get stressed by drought never reach their full potential, even if you fix the watering later.
When Things Don’t Go as Planned
Small, stringy sweet potatoes usually mean poor soil or inconsistent watering. If your soil is compacted or you’re alternating between drought and flood conditions, your plants can’t do their thing properly.
Cracked sweet potatoes happen when watering is irregular – drought followed by heavy watering makes the roots expand too fast. Consistent moisture through mulching prevents this.
If you’re getting gorgeous vines but tiny sweet potatoes, you’re probably overfeeding with nitrogen. Sweet potatoes need balanced nutrition, not a leafy green salad diet!
How to Grow Sweet Potatoes Organically and Sustainably
Organic All the Way
I’ve been organically growing sweet potatoes since day one, and it’s doable. Building healthy soil through composting creates an environment where good bugs thrive and naturally keep the bad ones in check.
My go-to organic spray for flea beetles is kaolin clay mixed with a bit of liquid soap and water. It creates a protective barrier that’s entirely safe for beneficial insects.
Planting flowering herbs around my sweet potato beds provides nectar for the good guys who eat the pests. It’s like running a bed and breakfast for beneficial insects!
Water-Smart Growing
With climate change making summers hotter and drier, water conservation has become really important to me. Rain barrels capture roof runoff and give me chlorine-free water for dry spells.
Thick mulch is a game-changer for water conservation. A good 4-inch layer of straw or shredded leaves can cut water needs in half while suppressing weeds and improving soil.
The Bottom Line
Growing sweet potatoes is one of the most rewarding things you can do in your garden. Once you get the basics down – healthy slips, warm well-draining soil, consistent water – they’re pretty forgiving plants.
Don’t rush the process, choose varieties that work for your climate, and always cure your harvest properly. The payoff is months of incredible homegrown sweet potatoes that taste infinitely better than anything you can buy.
The best part? Sweet potatoes are surprisingly low-maintenance once they get established. They handle heat and moderate drought better than most vegetables, making them perfect for lazy gardeners like me!
So there you have it – everything I’ve learned about growing sweet potatoes over the years! I’m telling you, there’s nothing quite like pulling those beautiful orange gems out of the soil after months of watching those vines take over your garden.
What’s your biggest sweet potato challenge? Struggling with getting slips started? Dealing with pests? Trying to maximize your harvest in a tiny space? I’d love to hear what you’re dealing with and help troubleshoot! Please drop me a comment and let’s chat. I’m always excited to talk sweet potatoes with fellow garden enthusiasts, but trust me, once you grow your own, you’ll never want to go back to store-bought!